Workflow Setup Examples
The following example shows the setup of a workflow from conception to completion.
The workflow in the example is a customer call ticket for a software company. When a customer has a problem a ticket is opened. A customer support technician will help the customer with the problem, possibly referring the problem to development for a solution. Eventually a solution is provided and the ticket waits for confirmation from the customer.
The designer of the workflow begins by flowcharting the decision making process of this workflow.
The Action Codes in a workflow represent the points of decision at which a number of results could be possible. Sometimes, there will only be one possible result, but in this case, the decision is timing; the decision is when to move the workflow along or whether to let it stay at its present state. Since the action codes represent these points of decision, they are represented in the flowchart by the decision diamonds.
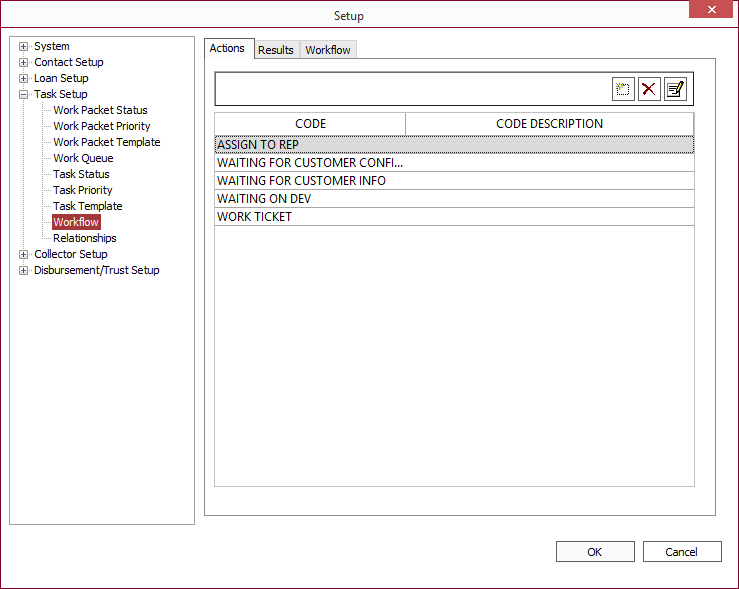
We need an action code to be configured for each of the decision diamonds, and therefore, our list of required action codes is:
| Assign to Rep |
| Work Ticket |
| Waiting for Cust Confirmation |
| Waiting for Cust Info |
| Waiting on Dev |
Go to Setup > Task Setup > Workflow > Actions tab.
Click Add  and add each of these five Action Codes.
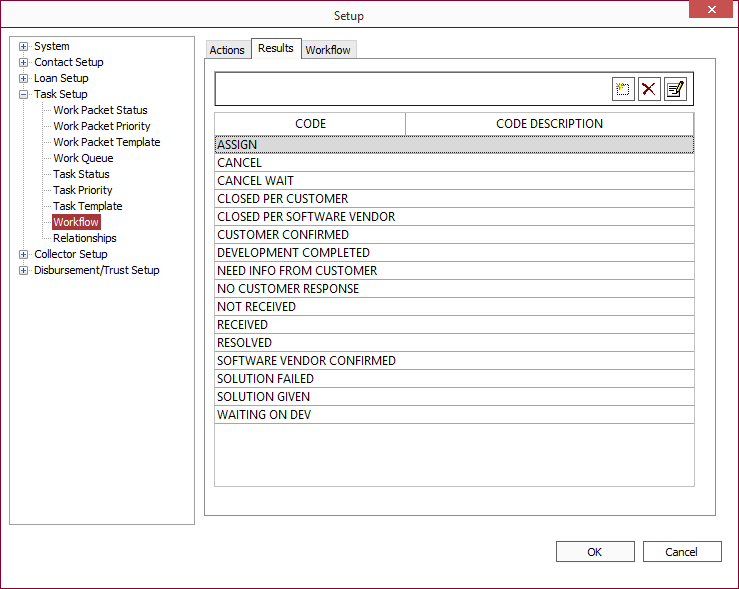
The Result Codes represent all of the possible results of the various points of decision in the work flow. Each result will then route the workflow to its next point of decision and assign it to a user or group of users. In the flowchart, the Result Codes are represented by the rectangular boxes. Therefore, the complete list of Result Codes that must be configured for this workflow is:
| Assign |
| Need Info From Customer |
| Solution Given |
| Waiting on Dev |
| Resolved |
| Closed Per Customer |
| Closed Per Software Vendor |
| Cancel |
| Received |
| Not Received |
| Solution Failed |
| Customer Confirmed |
| No Customer Response |
| Software Vendor Confirmed |
| Cancel Wait |
| Development Completed |
To add these Result Codes, go to Setup > Task Setup > Workflow > Results tab.
Click Add  and add each of the Result Codes.
Now that all the action and result codes needed for our workflow are added, we need to add the workflow itself and then configure the flow.
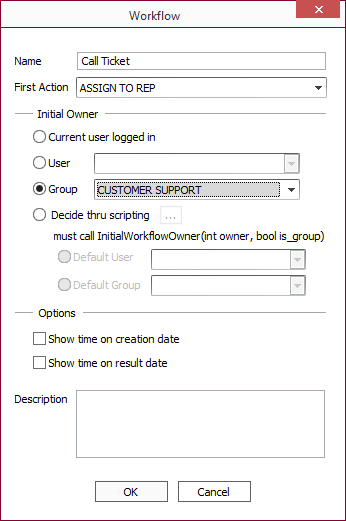
Go to the Workflow tab and click Add  at the upper section of the window.
Name the workflow: Call Ticket.
Set the first action to: ASSIGN TO REP.
Set the initial owner as a group: Customer Support (A group of this name must be configured in security).
Click OK.
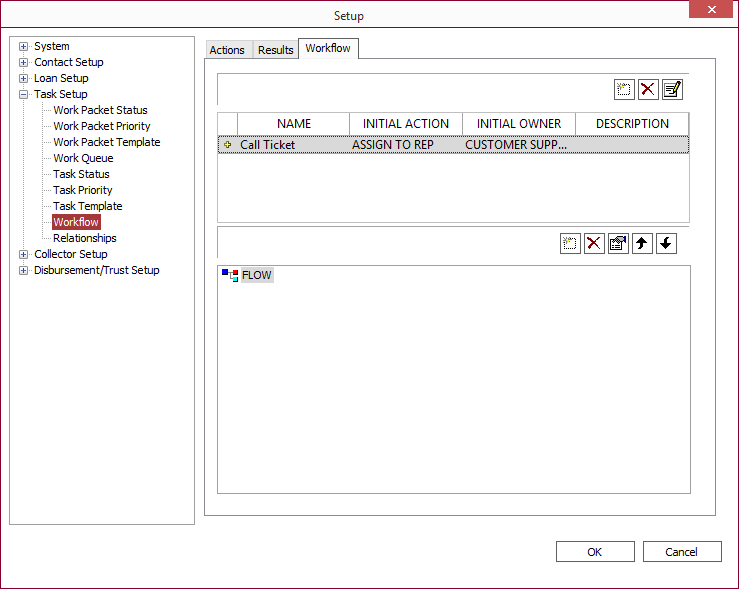
Next we will configure the flow by adding all of the actions to the flow. The add button for the flow is context sensitive. If Flow  is selected and Add
  is clicked, an Action Code
  will be added. If an Action is selected and Add
  is clicked, then a Result
  will be added. If a Result is selected and Add
  is clicked, a routing
  to a new Action will be added. If a routing is selected and Add
  is clicked, then a user or group assignment
  is added.
To add the Action Codes, click Add  and select the first Action Code. Then to add the second Action Code, click on Flow and click Add
  again. Repeat this until all five Action Codes are added to the Flow.
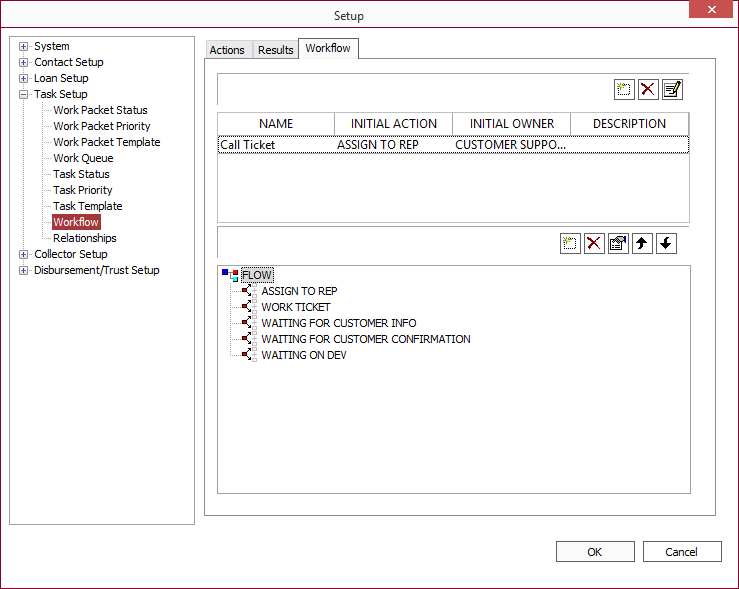
Now, click on each Action Code and click Add  to select the Result Codes that should be added to that Action.
From the flowchart, we can see that the possible results for each Action are:
| Action | Possible Result |
|---|---|
| Assign To Rep | Assign |
| Work Ticket | Need Info From Customer |
| Solution Given | |
| Waiting on Dev | |
| Resolved | |
| Closed Per Customer | |
| Closed Per Software Vendor | |
| Cancel | |
| Waiting For Cust Info | Received |
| Not Received | |
| Waiting For Confirmation | Solution Failed |
| Customer Confirmed | |
| No Customer Response | |
| Software Vendor Confirmed | |
| Waiting on Dev | Cancel Wait |
| Development Completed |
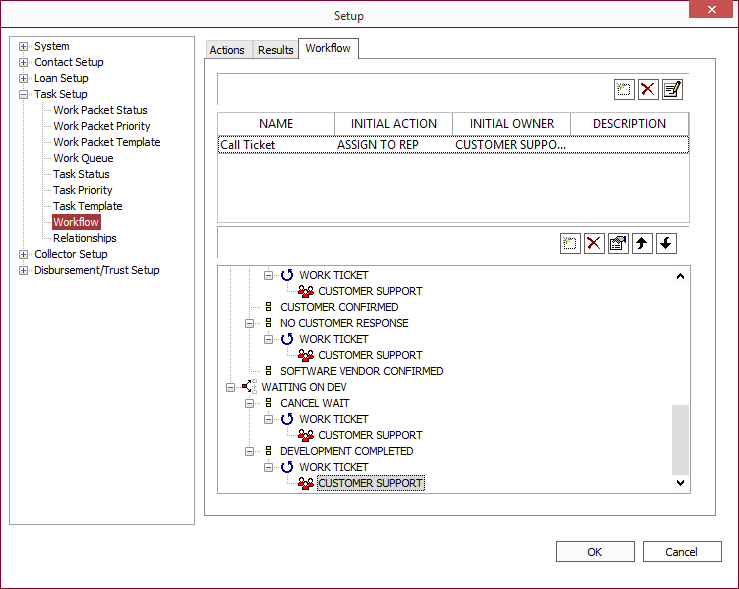
After each of the possible results are added to the flow under the appropriate actions, the flow will look like this:
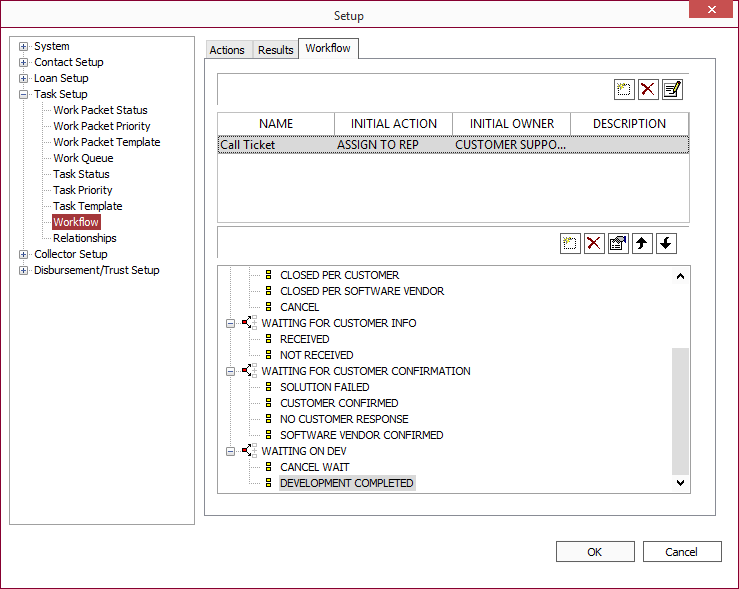
Every Result Code that is not intended to end the flow (and ultimately close the ticket) must be routed back to an existing action code.
From the flowchart, we can see that the routings from the Result codes should be:
| Result Code | Routes To |
|---|---|
| Assign | Work Ticket |
| Need Info From Customer | Waiting for Cust Info |
| Solution Given | Waiting for Confirmation |
| Waiting on Dev | Waiting on Dev |
| Resolved | END |
| Closed Per Customer | END |
| Closed Per Software Vendor | END |
| Cancel | END |
| Received | Work Ticket |
| Not Received | Work Ticket |
| Solution Failed | Work Ticket |
| Customer Confirmed | END |
| No Customer Response | Work Ticket |
| Software Vendor Confirmed | END |
| Cancel Wait | Work Ticket |
| Development Completed | Work Ticket |
To add these routings, click on each of the result codes in the flow and then click Add  . Select the Action Code that you are routing back to.
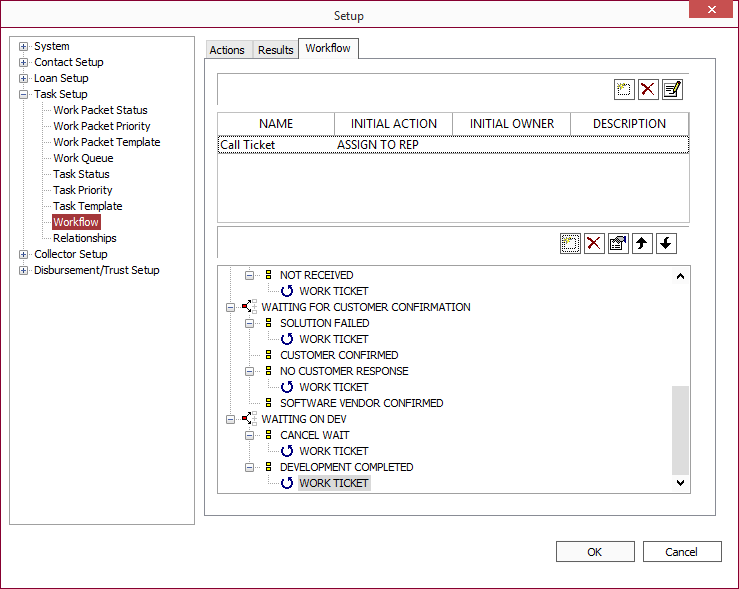
For each instance where a result is routed back to an action, the ownership assignment of the workflow must be defined. This allows the workflow (and consequently the call ticket) to be routed to different users and departments depending on the sequence of events and decisions.
To assign ownership to a routing, click on that routing and click Add  . Click Groups and select the group to assign ownership to. You can also select a specific user.
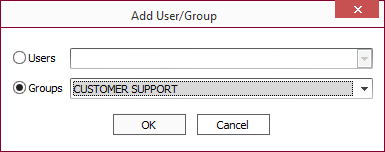
In our example, the call ticket will remain with the Customer Service Department (a separate Dev ticket is opened when the call ticket is waiting on Development), so we now do this for all nine of the routings in our workflow.
The final step of the workflow configuration is to make those result codes that end the work flow automatically close the call ticket. We can accomplish this by making use of a simple VBScript.
Begin by selecting the first of the Result Codes that does not route anywhere (Resolved) then click  .
.
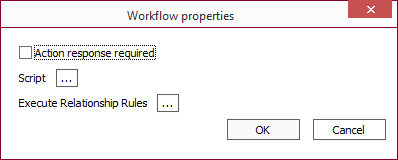
Click  next to Script.
Use the Event: When Result Field Changed.
Type in the following two lines of VBScript:
VBScript
NLSApp.SetField "TASK_STATUS", "COMPLETE"
NLSApp.SetField "TASK_COMPLETED", CStr(Year(Date)) + "/" + Right(("0"+CStr(Month(Date))),2) + "/" + Right(("0"+CStr(Day(Date))),2)
For this to work, you must have a task status code of “Complete.”
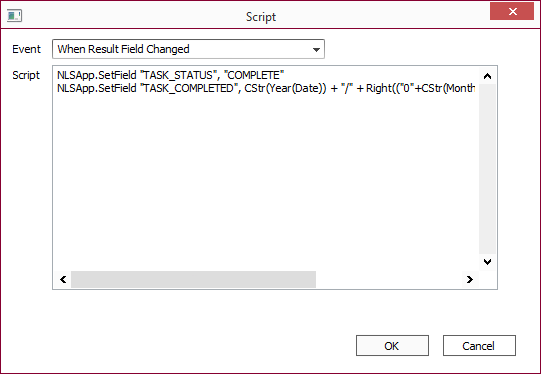
The first line of the script sets the status code of the task to complete.
The second line sets the task completed date to the present date, and the presence of a date in this field causes the completed checkbox on the task to be selected. This effectively automates the closing of the task.


