Email and SMS
For a step-by-step on how to set up email and SMS, download the Email and SMS How-To guide.
NLS can be configured to automatically send email and SMS text messages for the following events:
- ACH Added - when an ACH is added or re-activated.
- ACH Ended - when an ACH is disabled or expired.
- ACH Return - when an ACH return is processed.
- Card Added - when a recurring card transaction is added or re-activated.
- Card Ended - when a recurring card transaction is disabled or expired.
- Card Advance Notification - sent specified days before the card advance date.
- Card Decline (Recurring type) - when a recurring card transaction is declined.
- Card Processed (Recurring type) - when a recurring card transaction is processed.
- Late Notice - when a late notice is generated.
- NSF - when a non sufficient funds event occurs.
- Paid in Full - when a payoff is made.
- Payment Posted - when a payment is posted to a loan.
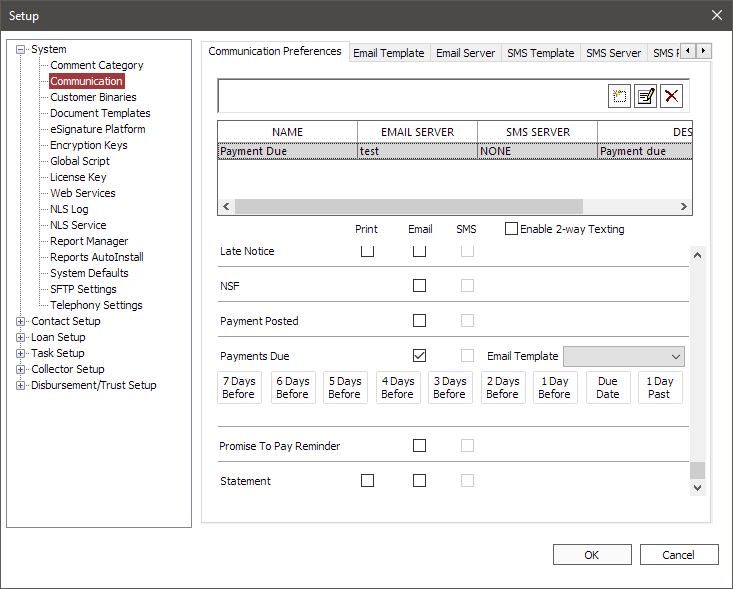
- Payments Due - when a payment is due.
- Promise to Pay Reminder - sent one day prior to a promise to pay date.
- Statement - when a statement is generated.
- Welcome Letter - when a new loan is opened.
The following items must first be configured before email and SMS can be used in NLS.
1. Configure System Defaults in Setup.
Click File then select Setup to open the Setup window. Select System Defaults under System.
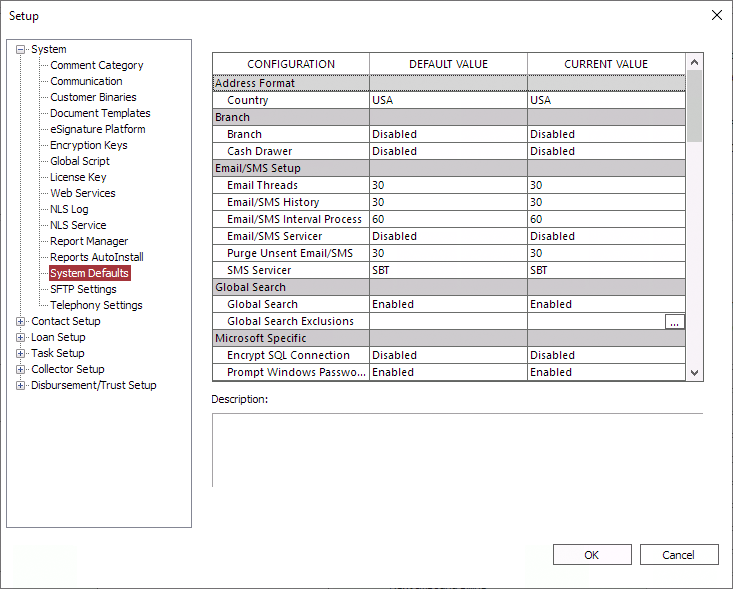
On the Email/SMS Servicer configuration, click on the Current Value column and choose NLS Service or NLS Client Application. This option determines whether the messages will be sent from the NLS Client Application or the NLS Service. For smaller user environments where the NLS Service may not be set up, the NLS Client Application can be used. For larger user environments and where automation is used, the NLS Service will keep track and process the message queue to send through the email and SMS servers. Both, client and service, function in the same way with the only difference being whether the client or service is processing the email and SMS.
| Email/SMS History | The number of days an email/SMS message that has been sent is stored in the database for historical reference. |
| Email/SMS Interval Process | The time interval in seconds that the email/SMS servicer will attempt to send email/SMS. |
| Email/SMS Servicer | The process which will handle the sending and receiving of messages. |
1.1 Configure Web Services in Setup for SBT 2.0
NLS 5.39 and later
When using SBT 2.0 for SMS messages, go to Setup > System > Web Services.
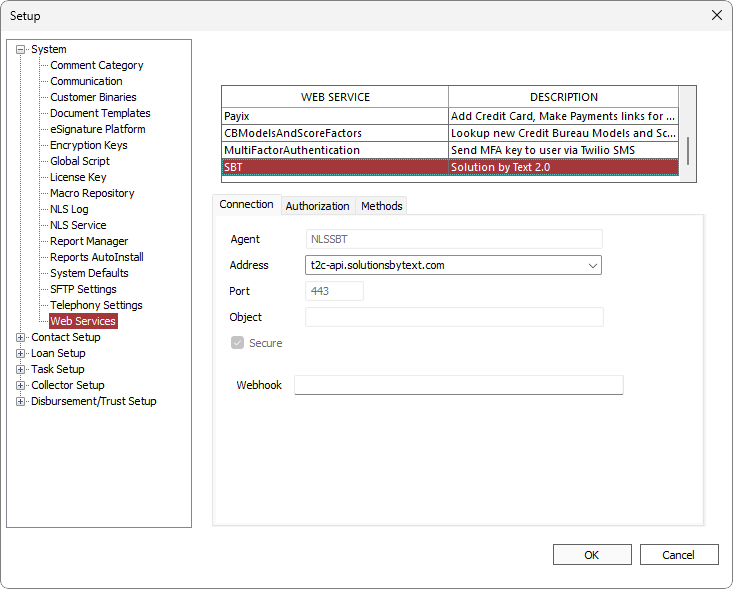
Select SBT from the list of web services.
Select the corresponding Address as provided by SBT.
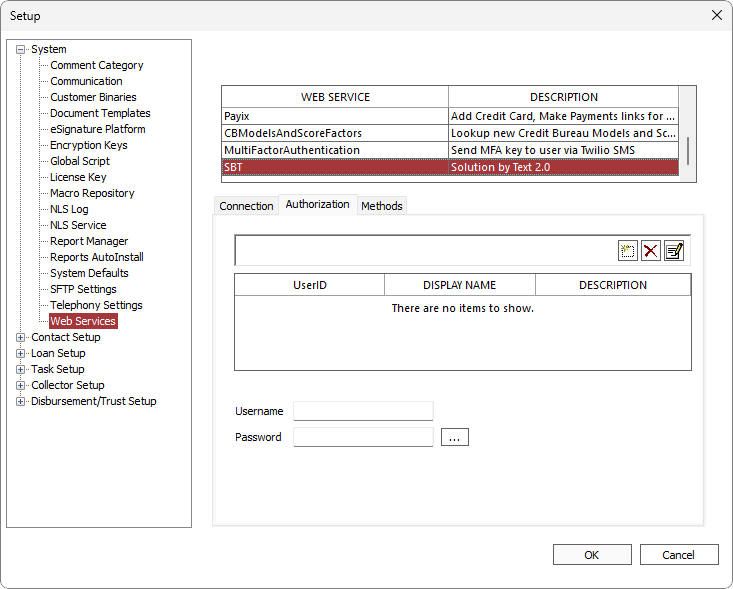
In the Authorization tab, add the username and password used to log in to SBT.
2. Configure Communication in Setup.
To set up NLS for email and SMS text messaging, click File then Setup, then System > Communication. An email server and an SMS server must be configured prior to creating a communications preference.
Email Server Tab
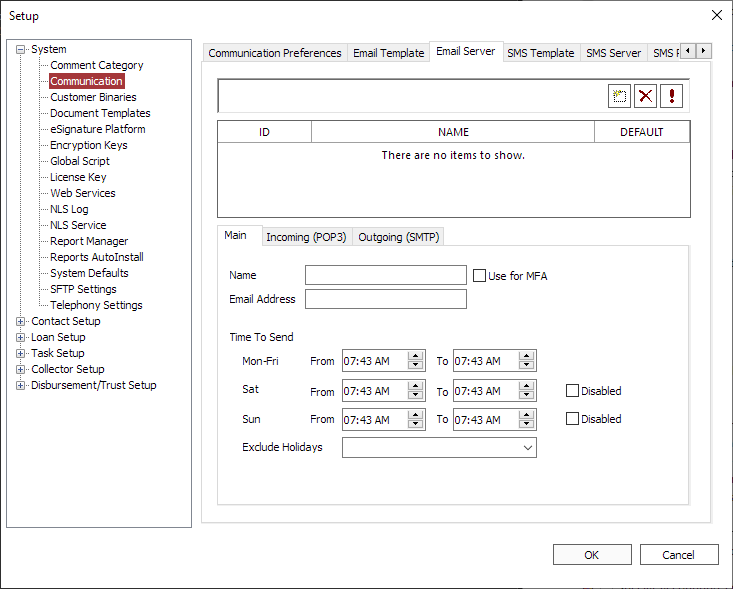
To add a new email server, click Add  . Enter a name for the email server and click OK.
Main Tab
| Name | Name of the email server. |
| Select this option to use this email server for multi-factor authentication. When selected, this email server setting will only be used for MFA. A test email will be sent to verify that the email server is working correctly. | |
| Email Address | Enter the email address as it will appear in the From line of the email. |
| Specify the window of time during which emails are to be sent. Emails will only be sent out between the times specified. Emails generated outside of this window will be held until the specified time, at which time they will be sent. The specified time is based on the time zone of the server’s location. |
|
|
Emails will not be sent on the holidays for the selected region as specified in the Holiday List.
Note Emails will not be sent on the actual holiday dates. Emails are still sent on the observed dates if they differ from the actual holiday dates. Example: If January 1st is on a Sunday but is observed on Monday January 2nd, emails will not be sent on Sunday but will be sent on Monday. |
Incoming (POP3) Tab (feature not yet implemented)
Outgoing (SMTP) Tab
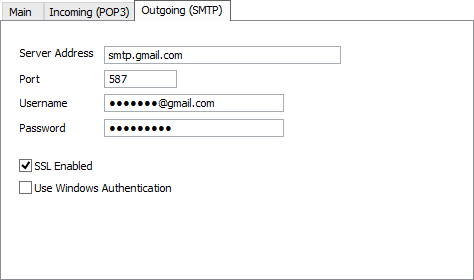
Enter the credentials for the outgoing email server in this tab. Check with your system administrator or your email service provider to obtain the required information.
| Server Address | Enter the server address for the SMTP server. Listed below are SMTP server info for some popular email services.
|
|||||||||||||||
| Port | Enter the port number used for SMTP.
|
|||||||||||||||
| Username | Enter the username for logging in to the server. | |||||||||||||||
| Password | Enter the password for logging in to the server. | |||||||||||||||
| SSL Enabled | When enabled, a secured socket layer connection will be used to connect to the server. | |||||||||||||||
| Use Windows Authentication | When enabled, Windows authentication will be used to log in to the server. |
Click Test  to test the server connection. A dialog will appear to indicate if a connection was made successfully or if any errors were encountered.
SMS Server Tab
Nortridge Software selected Solutions by Text (SBT) as the preferred text messaging service vendor. Accordingly, NLS comes pre-configured with an interface to SBT. Please contact SBT at info@solutionsbytext.com for details on text templates and pricing. If for any reason SBT does not meet the customer’s needs, interfaces with other texting services can be engineered through custom interfacing by the Nortridge Consulting Department.
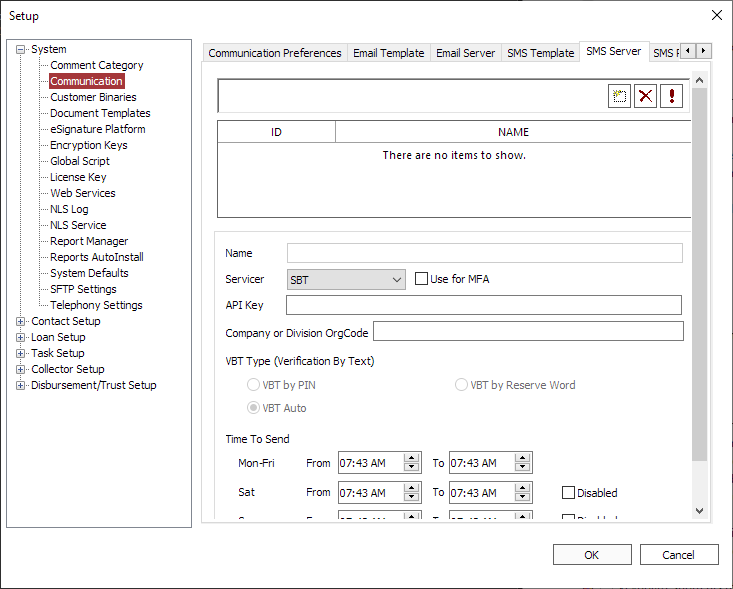
To add a new SMS server, click Add  . Enter a name for the server and click OK.
| Name | Name of the SMS server. | |||
|
Servicer5.16+
|
Select the servicer for sending SMS messages. | |||
|
Use for MFA5.34+
|
Select when using this SMS server for multi-factor authentication. This SMS server setting will only be used for MFA. A Group Code must be selected in the provided field when this option is selected. |
|||
| API Key (SBT 1.0) | Enter the API key provided by Solutions by Text. | |||
|
Web Service (SBT 2.0)5.39+
|
The User ID, as configured in the Authorization tab under the SBT web service selection in Setup > System > Web Services, to use to log into SBT. | |||
| Company or Division OrgCode (SBT 1.0) OrgCode (SBT 2.0)5.39+ |
Enter the root organization code provided by Solutions by Text. | |||
|
Group Code (SBT 2.0)5.39+
|
Enter the group code provided by Solutions by Text. | |||
| VBT Type |
Choose the method that will be used to verify the SMS phone number as configured with Solutions by Text.
Note Do not change the VBT Type without first consulting Solutions by Text. This must correspond to your configuration with Solutions by Text for proper operation.
|
|||
|
CSV Path5.16+
|
Path to the local CSV file to be used with D’LangE. | |||
| Time to Send | Specify the window of time during which SMS messages are to be sent. SMS will only be sent out between the times specified. Messages generated outside of this window will be held until the specified time, at which time the messages will be sent. The specified time is based on the time zone of the server’s location. |
|||
|
SMS messages will not be sent on the holidays for the selected region as specified in the Holiday List.
Note SMS messages will not be sent on the actual holiday dates. SMS messages will be sent on the observed dates if they differ from the actual holiday dates. |
Click Test  to test the server connection. A dialog will appear to indicate if a connection was made successfully or if any errors were encountered.
Note
Click OK to save the changes and re-launch NLS. The Communication Preferences configuration may not show the changes made to the Email Server and SMS Server settings until they have been saved.Communication Preferences Tab
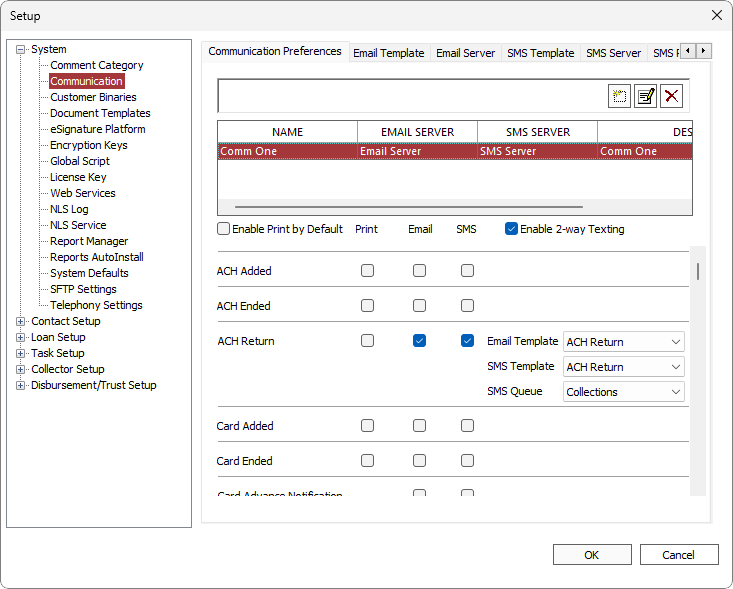
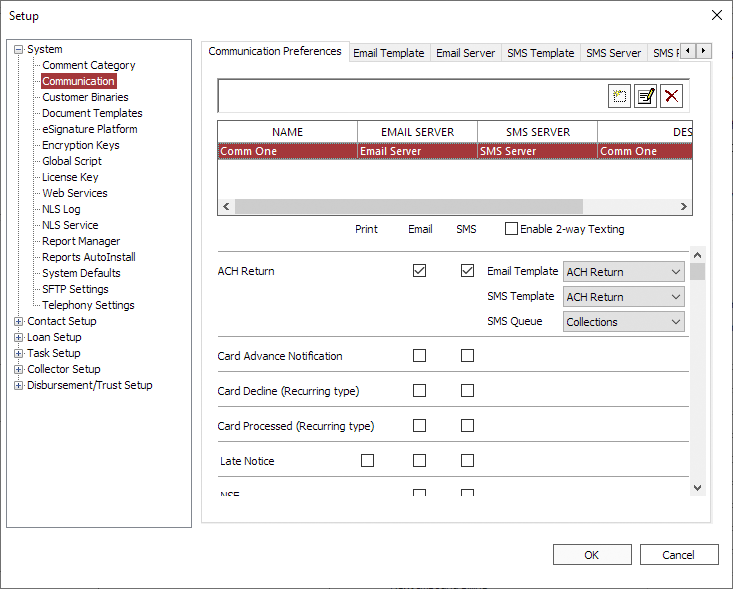
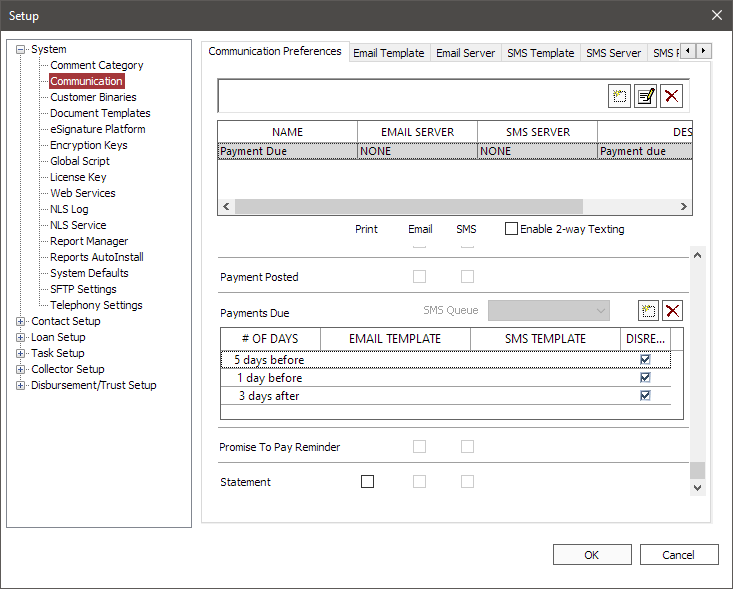
To create a communication preference, click Add  . Enter a name and a description for the preference and click OK.
Specify for each event, whether to make the option of printing, emailing, or sending a text message available for a loan. Only items that are selected will be available as an option in a loan’s communication preferences discussed below. Choose a corresponding template for use with print, email, and SMS options.
NLS 5.21 and later
Select Enable 2-way Texting to enable the receiving of SMS messages. SMS messages are managed in Collector Mode.Only available when 2-way texting is enabled, SMS Queue specifies to which queue category the SMS messages are to be stored under. As of NLS 5.21, Collections is the only supported queue at this time.
Email Template Tab
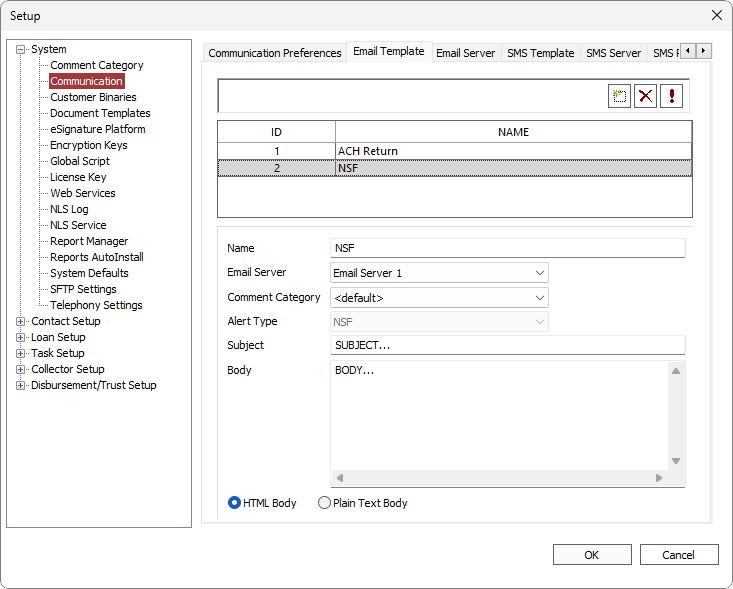
To create a new email template, click Add  . Enter a name and click OK.
| Name | The name of the email template. |
| Email Server | Drop down list of available email servers. |
| The comment category under which the email will be stored. | |
| Alert Type | Specify the type of alert that this message is to be associated with. |
| Subject | Subject line of the email. |
| Body | Body of the email. |
| Body Encoding | Click to select the buttons to choose between HTML or plain text email messages. |
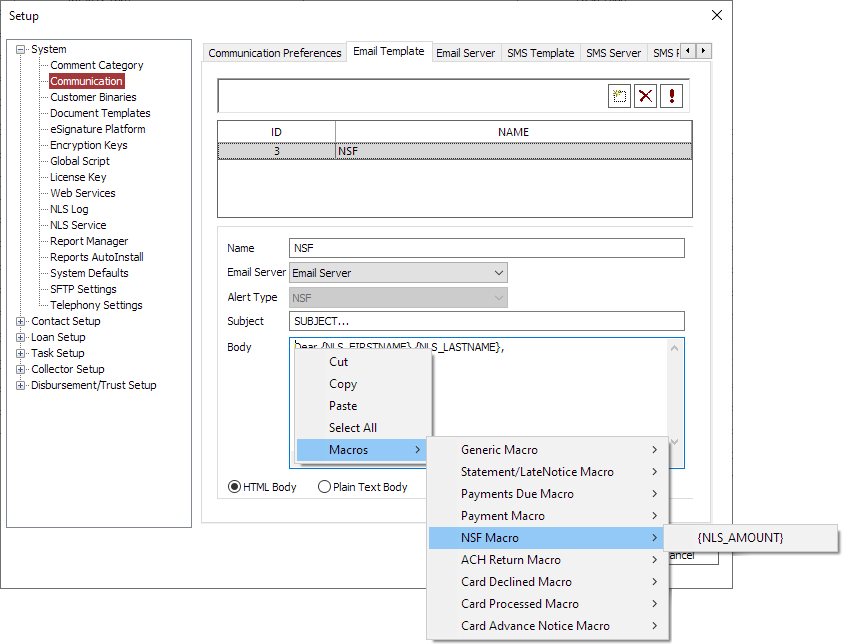
While editing the subject and body of the template, right-click in the field and select from available keywords (variables) from the Macros menu.
With the exception of the generic macros, all other macros are specific to the selected Alert Type. For example, if the Alert Type is NSF, only those macros listed under NSF Macro and Generic Macro may be used in the template.
Click Test  to test the email template. A dialog will prompt you for an email address to send the template. Check the email to verify that the template is formatted accordingly.
NLS 5.7.7 and later
Warning
Changing the Email Server setting will clear the Email Template selection under Communication Preferences.
Email template keywords
Generic Macro
| KEYWORD | COMMENT |
|---|---|
| {NLS_ACCTREFNO} | |
| {NLS_LOANNUMBER} | |
| {NLS_LOANNUMBER_LAST_4_CHARS} | |
| {NLS_LOAN_TIN_LAST_4_CHARS} | |
| {NLS_CONTACT_TIN_LAST_4_CHARS} | |
| {NLS_FIRSTNAME} | |
| {NLS_LASTNAME} | |
| {NLS_COMPANY} | |
| {NLS_ADDRESS1} | |
| {NLS_ADDRESS2} | |
| {NLS_CITY} | |
| {NLS_STATE} | |
| {NLS_ZIP} | |
| {NLS_TOTAL_CURRENT_DUE} | |
| {NLS_TOTAL_PAST_DUE} | |
| {NLS_DAYS_PAST_DUE} | |
| {NLS_PAYOFF_AMOUNT} | |
| {NLS_BRANCH_PHONE_NUMBER} | |
| Dealer Contact # in the Classification tab of Loan Setup must be specified and the K1 Segment Creditor Name in Dealer Setup must be specified. | |
|
{NLS_PTP_AMOUNT}5.7.3+
|
|
|
{NLS_PTP_DATE}5.7.3+
|
|
| Use to access macros in the repository where GUID is the macro identifier. |
Statement/Late Notice Macro
| KEYWORD | COMMENT |
|---|---|
| {NLS_STATEMENT_DATE} | |
| {NLS_STATEMENT_DUE_DATE} | |
| {NLS_STATEMENT_PAYOFF_AMOUNT} | |
| {NLS_STATEMENT_TOTAL_CURRENT_DUE} | |
| {NLS_STATEMENT_TOTAL _PAST_DUE} |
Payments Due Macro
| KEYWORD | COMMENT |
|---|---|
| {NLS_DAYS_BEFOREAFTER_DUE_DESC} | |
| {NLS_DUE_DATE} | |
| {NLS_DUE_AMOUNT} |
Payment Macro
| KEYWORD | COMMENT |
|---|---|
| {NLS_AMOUNT} | Payment amount. |
NSF Macro
| KEYWORD | COMMENT |
|---|---|
| {NLS_AMOUNT} | NSF amount. |
ACH Return Macro
| KEYWORD | COMMENT |
|---|---|
| {NLS_AMOUNT} | Amount returned. |
Card Declined Macro
| KEYWORD | COMMENT |
|---|---|
| {NLS_AMOUNT} | Amount declined. |
Card Processed Macro
| KEYWORD | COMMENT |
|---|---|
| {NLS_AMOUNT} | Amount processed. |
Card Advance Notice Macro
| KEYWORD | COMMENT |
|---|---|
| {NLS_CC_NEXT_PROCESS_DATE} | |
| {NLS_CC_DAYS_BEFORE_PROCESS_DATE} | |
| {NLS_AMOUNT} | Amount advanced. |
Paid in Full Macro
| KEYWORD | COMMENT |
|---|---|
|
{NLS_EFFECTIVE_DATE}5.37+
|
Valid only for Paid in Full event. |
ACH Added/Ended Macro
| KEYWORD | COMMENT |
|---|---|
|
{NLS_ACH_DESC}5.37+
|
Valid for ACH Added and ACH Ended events. |
Card Added/Ended Macro
| KEYWORD | COMMENT |
|---|---|
|
{NLS_CARD_DESC}5.37+
|
Valid for Card Added and Card Ended events. |
|
{NLS_CARD_LAST_FOUR_DIGITS}5.37+
|
Valid for Card Added and Card Ended events. |
SMS Template Tab
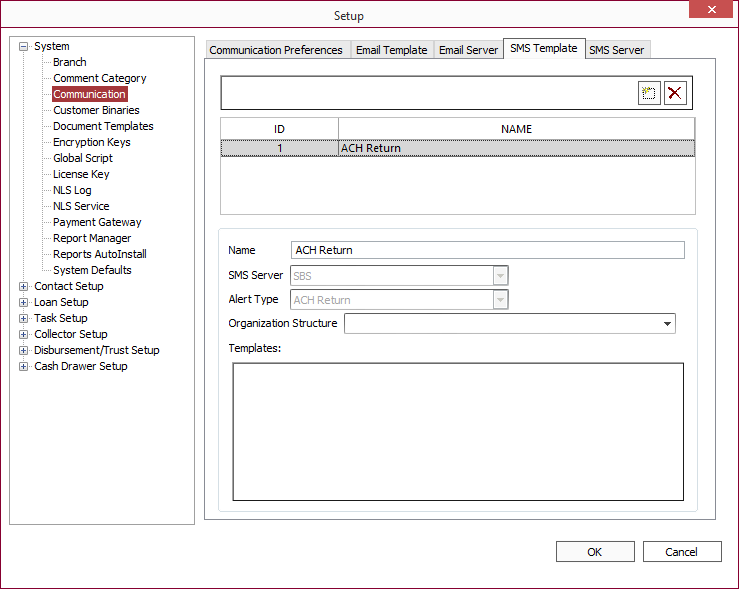
To add a new SMS event, click Add  . Enter a name for the event, choose the SMS server to use from the drop down list, and choose an alert type that will trigger the SMS from the drop down list. Choose an organization structure and select the checkbox for the template to use for this event.
Note
Templates are configured by Solutions by Text for your account.The email template keywords can be referenced when designing your SMS templates with SBT.
| Name | Name of the SMS template. |
| SMS Server | Drop down list of available SMS servers. |
| Alert Type | Specify the type of alert that this message is to be associated with. |
| Organization Structure | Choose an organization structure as provided by Solutions by Text. |
| Templates | List of available SMS templates. Click to select the template to use. |
Once all of the information in entered, click OK to restart NLS for the changes to take affect.
SMS Response Template Tab
NLS 5.21 and later
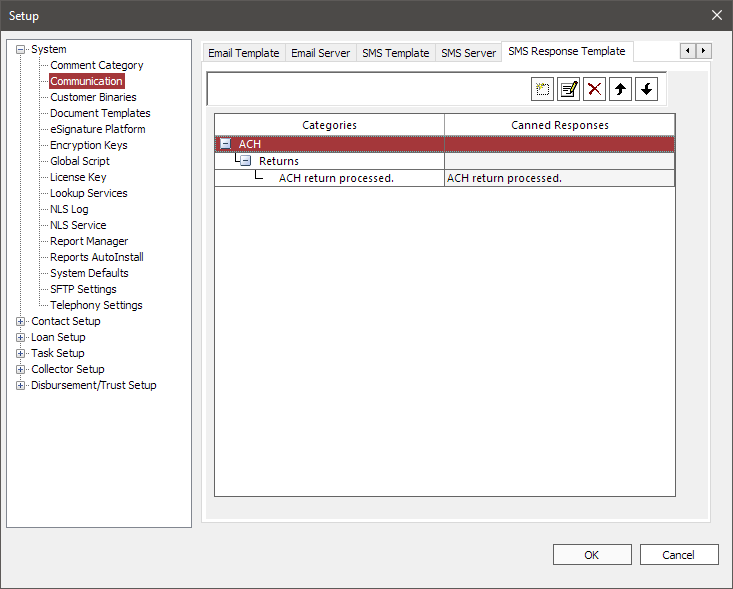
SMS response templates are canned SMS responses used to reply to incoming SMS messages in Collector Mode.
 Add Add |
Add a new category or a canned response. |
 Modify Modify |
Edit the selected item. |
 Delete Delete |
Delete the selected item. |
 Move Up Move Up |
Move the selected canned response up in the list. |
 Move Down Move Down |
Move the selected canned response down in the list. |
To add a new canned response, click  .
.
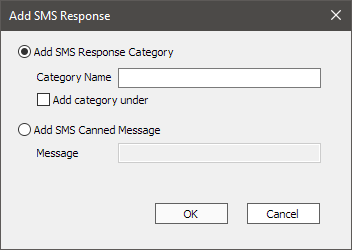
| Add SMS Response Category |
Canned responses may be grouped under categories for better organization.
|
||||
| Add SMS Canned Message | The canned response that will be sent. |
Security
5.4 and later
Security for communication preferences, email template, email server, SMS template, and SMS server can be set individually to view, update, add, and delete for users and groups in their respective System > Communication privileges.
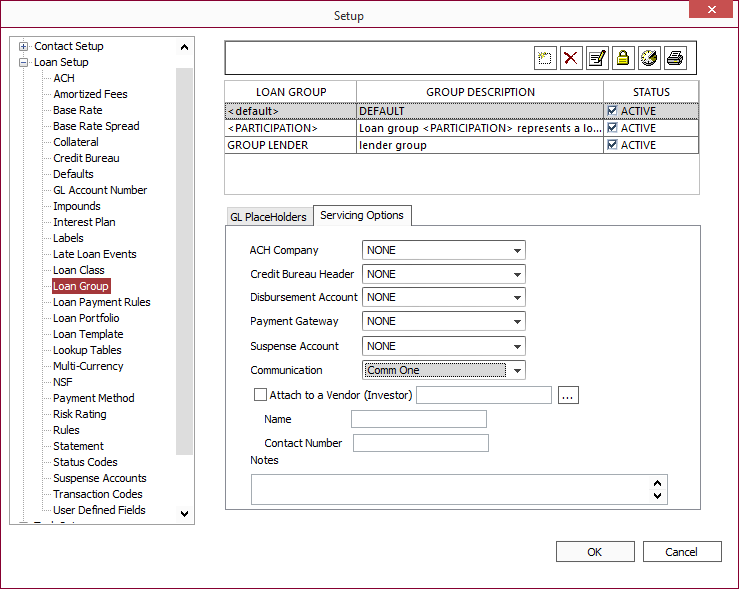
3. Configure Loan Group in Setup.
Click the Main slider on the shortcut bar, then Setup, then Loan Setup > Loan Group.
Click the Servicing Options tab and choose the Communication preference to use for this loan group from the drop down list.
4. Configure Loan Communication Preferences
To set up a loan with email and SMS events, query the loan and highlight it in the treebar. Click the Loan tab on the ribbon bar then click Communication Preferences  .
.
Note
If a communication preference is not associated with the loan group to which the loan belongs to, the Communication Preferences menu will be disabled.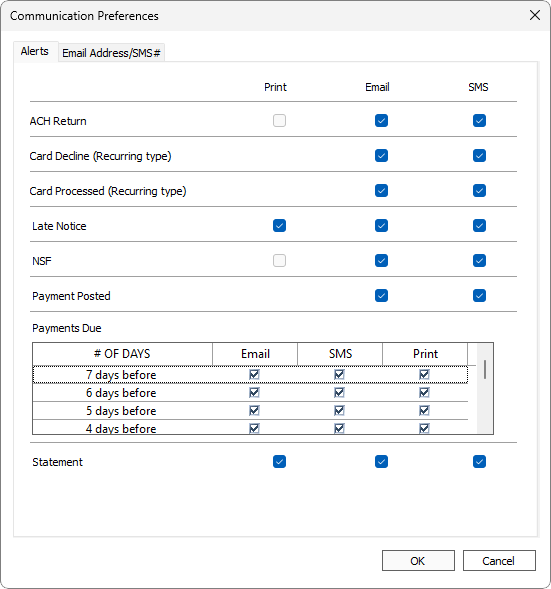
In the Alerts tab, select the alert types that will trigger an email or SMS for this loan. Only alert types that have been configured and selected in Setup for that communication preference are listed and can be selected. Alert types that have not been configured for email or SMS will be grayed out or will not be listed.
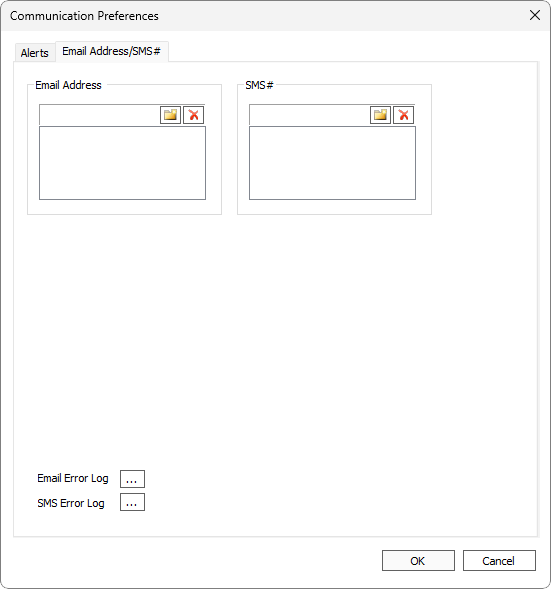
In the Email Address/SMS # tab, configure the email address and SMS numbers of the recipient.
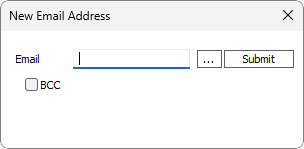
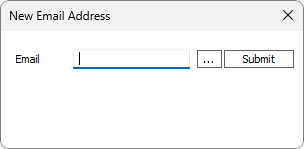
In the Email Address section, click New  and enter an email address of the recipient.
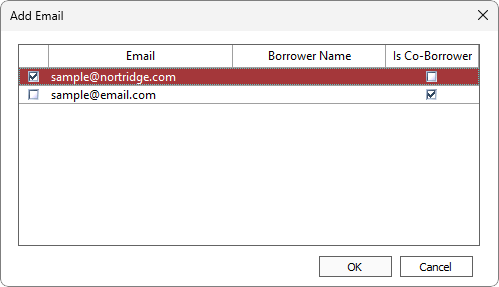
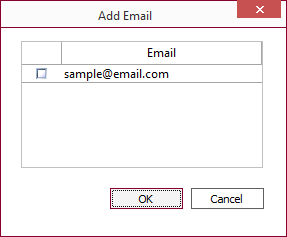
Or click  to choose from a list of email addresses associated with the loan.
Select the email address to use and click OK. Finally, click Submit to add the email address to the list.
Multiple email addresses may be entered separately.
In the SMS # section, click New  and enter the phone number of the recipient.
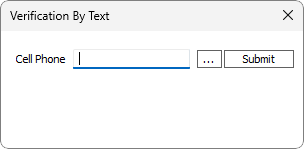
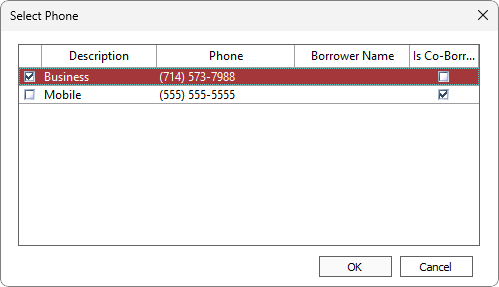
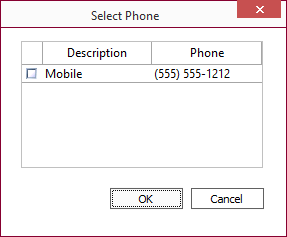
Or click  to choose from a list of mobile phone numbers associated with the loan.
Select the phone number to use and click OK.
Once a phone number is entered, click Submit. A verification message, as defined in the SMS Server VBT setup, will be sent to the phone number. Follow the verification process to validate the phone number.
Note
Once a phone number has been verified, the same phone number will not require a verification even if the same phone number is added to another contact or loan. A verification will be required only after the phone number has been completely removed from the NLS database.To delete an email address or SMS #, highlight the item in the list and click  .
.
Error Log
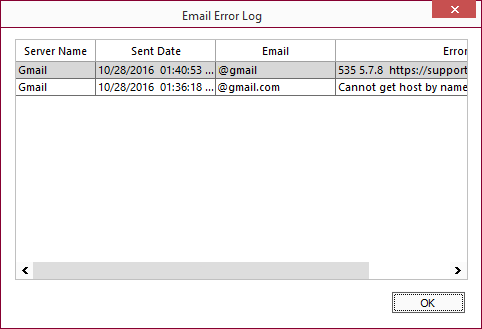
Click  next to Email Error Log or SMS Error Log to see a list of errors that has been logged for the respective connections.
