NLS Desktop
The NLS Desktop is comprised of several panes and a ribbon bar designed for interacting with the program. These items are context sensitive and its functionality and available options will vary based on your current working data.

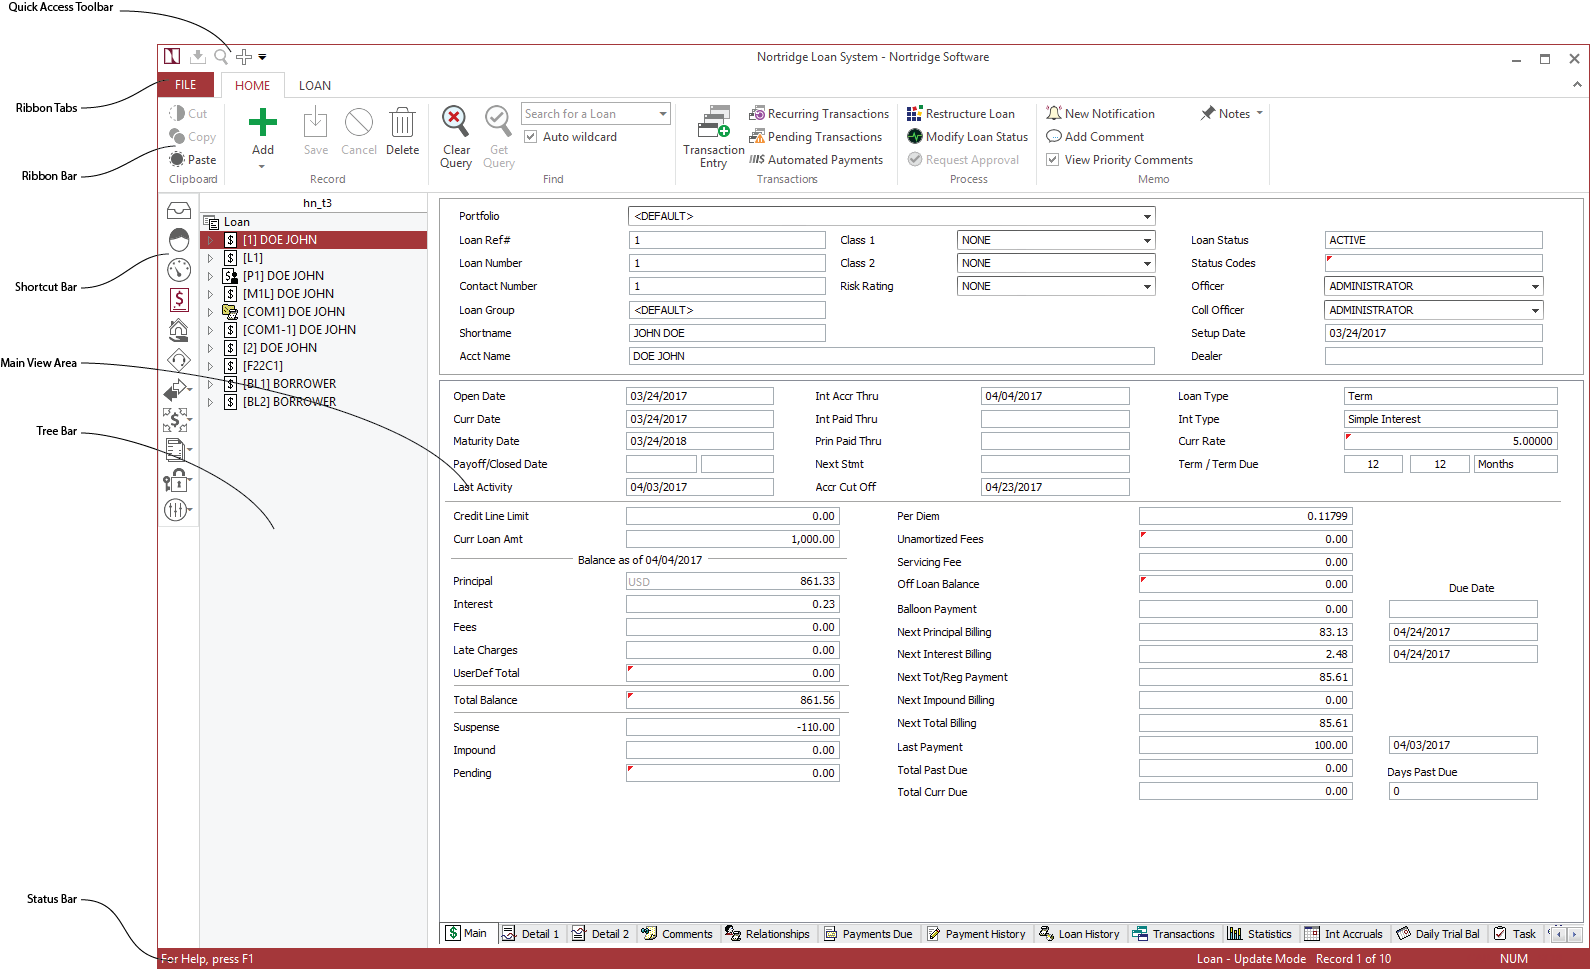
Ribbon Bar
The Ribbon Bar is a collection of icons and drop down menus from which various functions of NLS can be accessed.

The ribbon bar is comprised of the Ribbon Tabs or Ribbon Pages (e.g. File, Home, Loan), Tab Groups or Page Groups (e.g. Clipboard, Record, Find), and individual commands (e.g. Add, Get Query, Transaction Entry).
To access one of the drop down menus, either click on  below or next to the label, or hit the Alt key and type the corresponding letters that appear on the screen for that item.
Example
To bring down the File menu, press Alt then F.Sometimes a selection in a drop down menu will have a small arrow pointing to the right. This arrow indicates that another menu is associated with that item. Bring your pointer down to the indicated item, and a new menu will appear to the right. You can access any item on this new menu normally.
Some menu items may not currently be available for use. These items are shown in a lighter gray color and are disabled.
The Ribbon Bar can be minimized by clicking  located at the upper right corner of the window or by double clicking a Ribbon Tab. Clicking on the Ribbon Tab while minimized will temporarily display the content of the tab until a command is selected. Clicking
  located at the upper right corner of the window or double clicking a Ribbon Tab will perpetually show the entire Ribbon Bar.
Shortcut Bar
The Shortcut Bar contains items for quickly accessing various functions of NLS.

 Inbox Inbox |
This icon will bring up the NLS Task Manager. | ||||||
 Contact Contact |
Clicking this icon will bring up the Contact view. | ||||||
 Dashboard Dashboard |
Clicking this icon will bring up the Dashboard view. | ||||||
 Cash Drawer Cash Drawer |
Clicking this icon will bring up the Cash Drawer view. This icon is visible only when Cash Drawer is enabled in System Defaults. | ||||||
 Loan Loan |
Clicking this icon will bring up the Loan view. | ||||||
 Collateral Collateral |
Clicking this icon will bring up an entry screen for any collateral items which are to be tracked separately from any specific loan accounts. Collateral is usually entered and accessed from the loan that it collateralizes. | ||||||
 or or  Campaign Builder Campaign Builder |
Clicking this icon will bring up the collection mode Campaign Builder. | ||||||
 Processing Processing |
Clicking this icon will display a menu with the following choices:
|
||||||
 Disbursement Disbursement |
Clicking this icon will display a menu with the following choices:
|
||||||
 Reports Reports |
Clicking this icon will display a menu with the following choices:
|
||||||
 Security Security |
Clicking this icon will display a menu with the following choices:
|
||||||
 Custom Custom |
This icon is hidden by default and will appear when certain components, such as Customer Binaries, is configured in NLS. |
 Transaction
 Accrual
 Modify GL
 GL Interface
 Document Printing
 DPV Validation
 Disbursement
 Vouchers to Print
 Print Checks
 Process Voucher as ACH
 Disburse Funds via Cash Drawer
 Reports
 Statements
 Reprint Statements
 Cash Flow Reports
 User
User Group
Group Default Privileges
 Entry Log
 Privileges Change Log
 Active Users
Tree Bar
The Tree Bar is where the entire list of the current query is displayed.
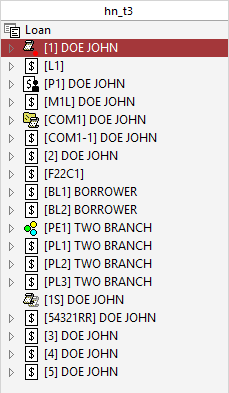
The name of the database connection to which you are currently connected to is shown at the top of the tree bar.
If multiple database connections are live at the same time, queries from separate databases are not merged on the tree—each database must be queried separately.
The default settings in System Setup are currently set to show last name first. This is the default setting for the Contact Tree Bar, but the administrator can set it differently. Placing your cursor over the name will show a tooltip with the entire name displayed.
Contact View / Loan View
The Contact View / Loan View is the section of the screen where the detailed information of the currently selected contact or loan is displayed.
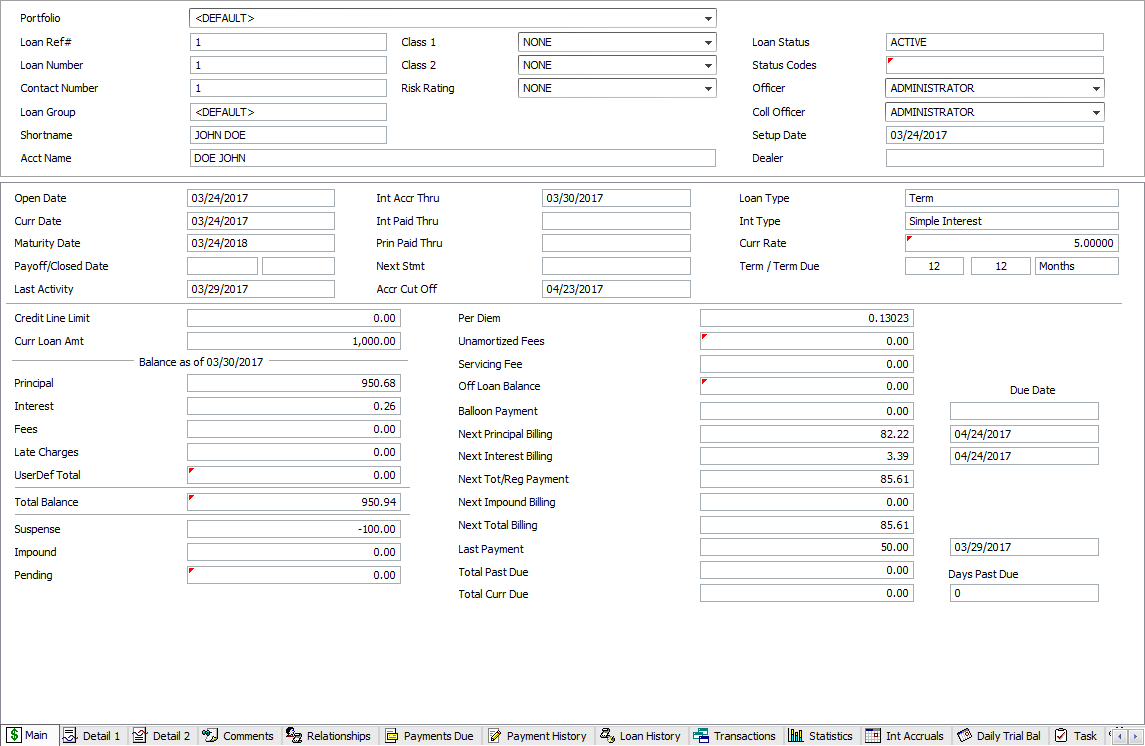
The upper portion of the Contact View / Loan View contains the main information fields for the selected contact or loan. The lower portion shows different sets of informational fields depending on which tab, located along the bottom of the view area, is selected.
