 Relationships
The Relationship tab allows you to add a contact relationship, a contact - loan relationship, or an address book entry.
To create a relationship between two Contacts, between a contact and a loan, or to create an address book entry, query one of the contacts and select the Relationships tab.
Click  to add a new relationship record.
NLS 5.21 and later
Employer type relationships are managed in its own Employment tab.Choose the relationship code from the Relationship drop down list. The list will contain relationship codes configured in the Relationships and Contact-Loan Relationships setup.
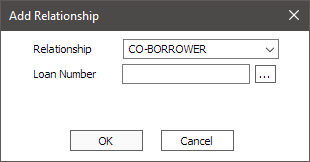
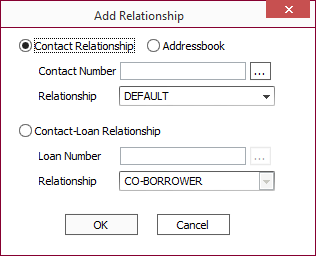
 next to the Contact Number field to look up the contact to link to the currently selected contact. next to the Loan Number field to look up the loan to link to the currently selected contact.
NLS 5.23 and later
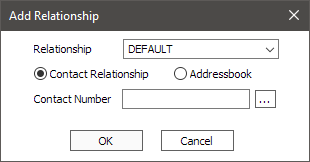
Addressbook entries are entered in the Addresses tab when the hide Addresses option is not selected for the contact type.Choose whether this is a Contact Relationship or an Addressbook entry.
If this is a contact relationship, click next to the Contact Number field to look up the contact that you want to link to the currently selected contact. Enter a search criteria on the Find Contact window then click the Find Now button.
The contacts that meet your criteria will be loaded onto a list at the bottom of the Find Contact window. Double-click the correct contact.
You will be returned to the Add Relationship window, and the contact number will automatically be entered into the Contact Number field. Select a Relationship code from the drop down list then click OK to save the new Contact relationship. A relationship will be added to both contacts.
NLS 5.31 and later
Right click on a contact in the relationships tree and select View Contact to view the details of the contact.NLS 5.35 and later
Select Inactive Record to deactivate the relationship. An inactive relationship will be indicated by a grayed out icon.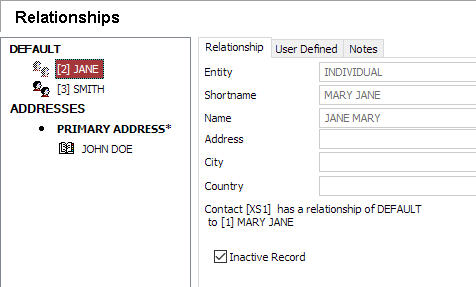
For inactive relationships:
- statements and notices will not be sent
- will not be reported on Metro 2
- bankruptcy status will not be set if the associated loan enters bankruptcy
This option is only available for contact-loan, contact-contact, and contact-addressbook relationships. It is not available for address and employer type relationships.
Security 5.35.6+
To disable this option for contact-loan relationships, both Contacts > Contact-Loan Relationships and Loan > CIF-Loan Relationships Update security privileges must be revoked. For other types of relationships, only the Contacts > Contact-Loan Relationships Update security privilege need to be revoked.
NLS 5.7 and later
When an Employer type relationship is added as an Addressbook, additional fields will become available in the Relationship tab.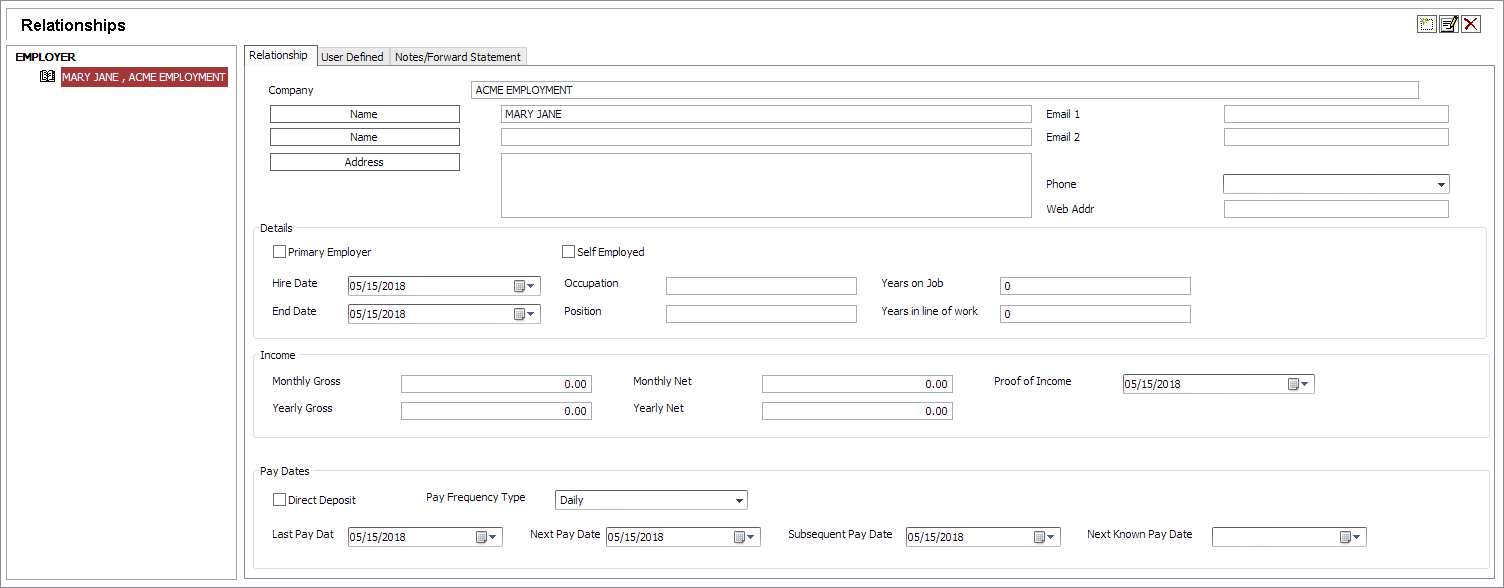
Credit Bureau / Forward Statement / Notes tab
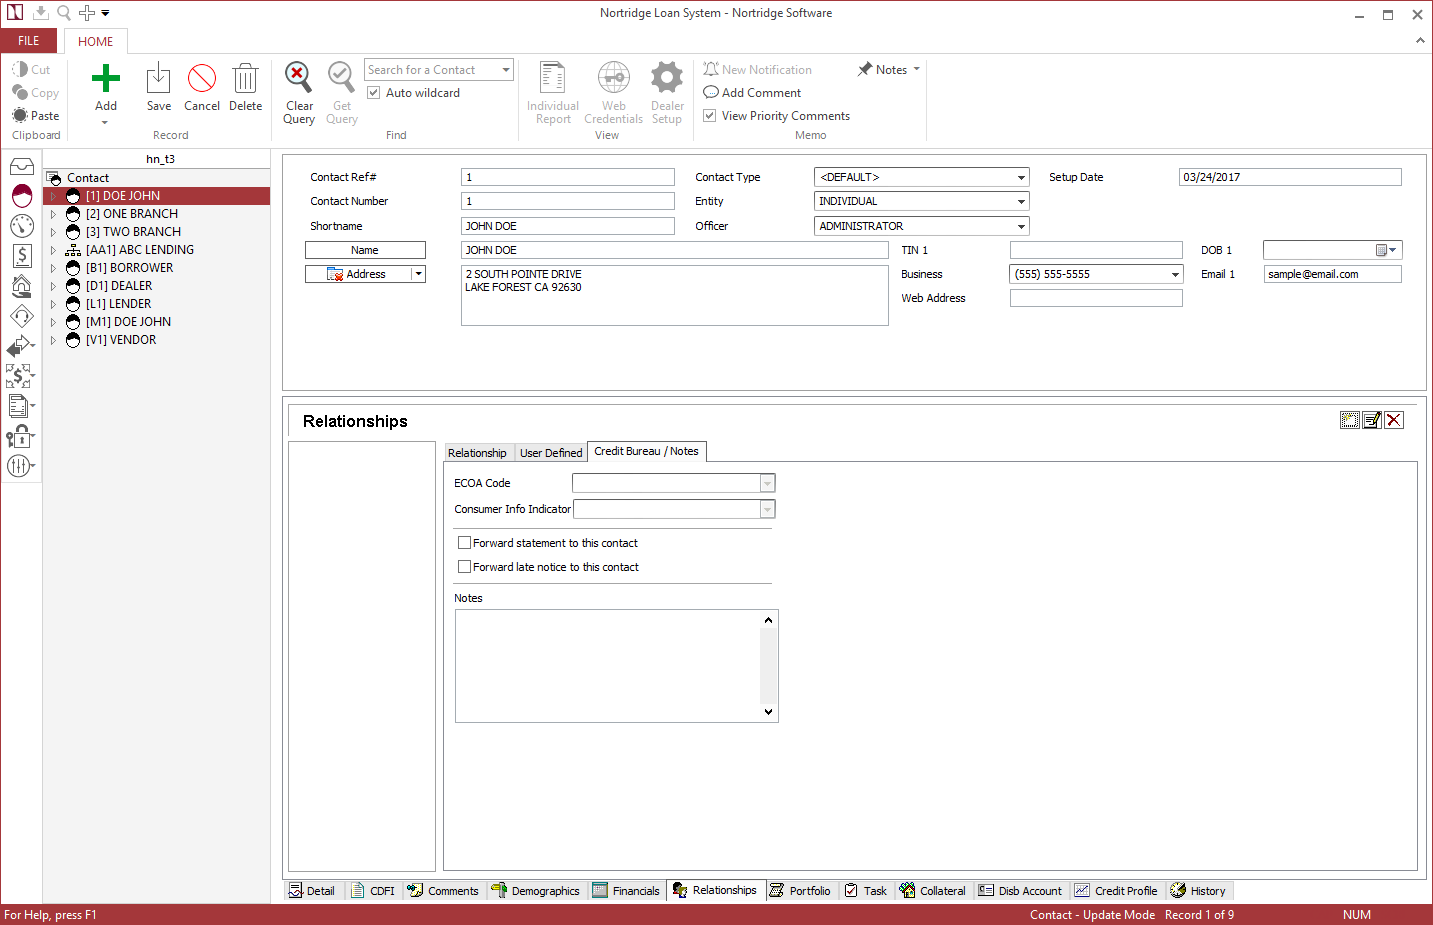
| ECOA Code | Select the ECOA Code associated with this relationship for credit bureau reporting. |
| Consumer Info Indicator | Select the Consumer Info Indicator code associated with this relationship for credit bureau reporting. |
| Forward statement to this contact | When selected, the statement generated for the loan will contain additional page(s) addressed to the related contact. |
| Forward late notice to this contact | When selected, the late notice generated for the loan will contain additional page(s) addressed to the related contact. |
| Notes | Enter any notes for this relationship into this field. |
