NLS Service
The NLS Service can be used to schedule the accrual process, report generation, ACH processing, archiving, and other processes that are routinely run without the need for user interaction.
The NLS Service is not installed by default on client computers and should only be installed on those computers intended to run an automated process. During the installation process, the NLS Service may be installed by selecting Custom/Complete installation and selecting the NLS Service from the list of items to install.
ASP/Switch
For ASP/Switch customers, NLS Service is already installed and ready to use in the hosted environment. Configuration is not necessary. Skip ahead to Automated Accruals.Configuration
- Navigate to the bin directory (
C:\Program Files (x86)\Nortridge Software\NLS\bin) and double click
NLSServiceMonitor.exe. If you receive the error message below, you will need to right-click the
NLSServiceMonitor.exeand select Run as administrator.
This will present the following dialog box: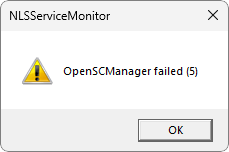
If you had a previous version of the NLSService Installed, you will see a different dialog box which will give you the option to remove the old NLSService—click Yes. After the old Service has been removed, click File > Connect to another computer. Select the computer that you want to connect to and you will then be to the screen shown above, where you may proceed with the remaining steps.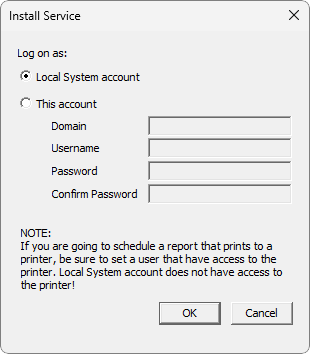
- Fill in the Windows account information and click OK.
- Start the service by clicking
 on the toolbar.
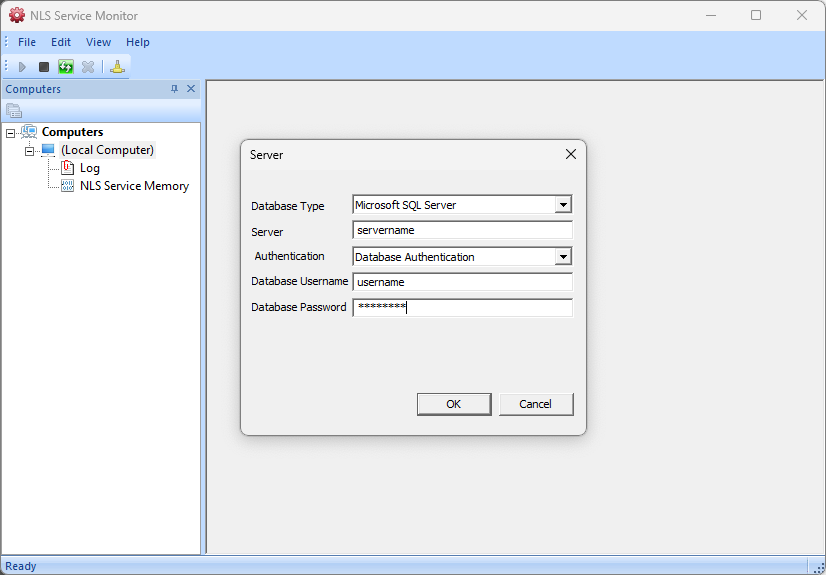
 - Right-click on Local Computer and select Add Server.
Fill out the database information.
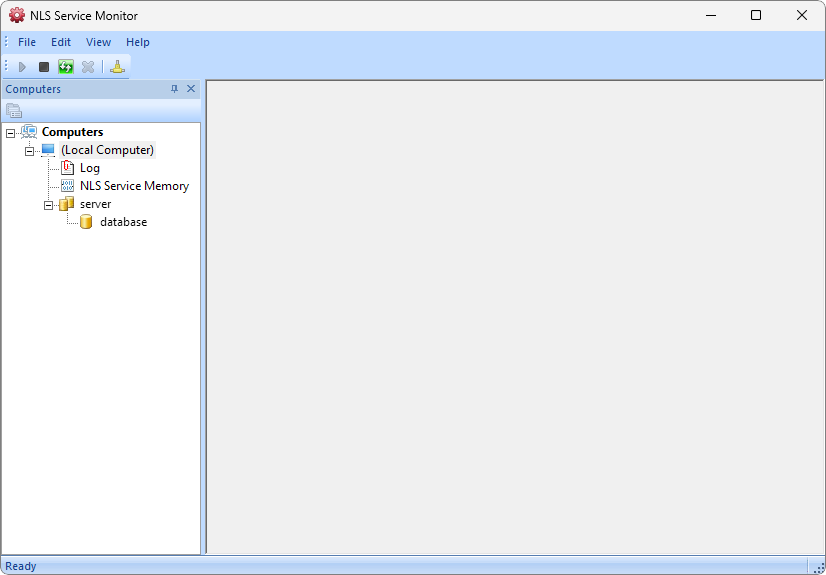
This will scan the available NLS databases on the server. If there are several databases, the process could take some time. Once it is complete, select the NLS database for which you want to configure the service and click OK. - After the database has been added, it will appear in the tree of the Service Monitor.
- Go to Edit > Options and fill out a path for the log file (optional) and the path of the folder where NLS is installed.
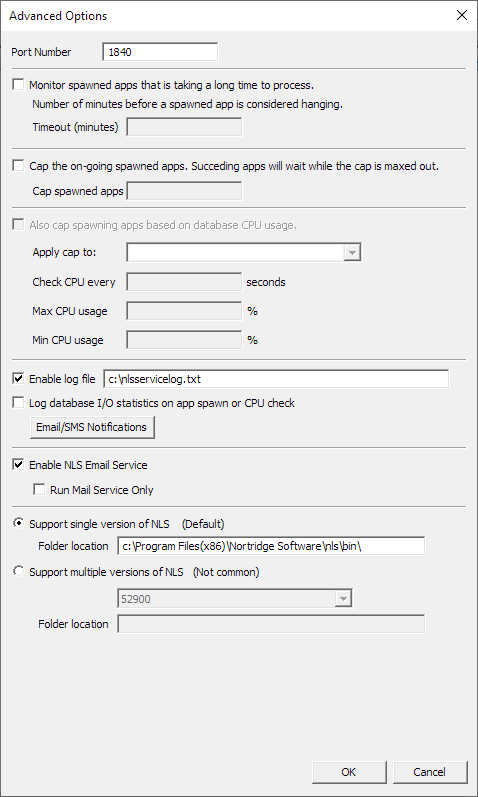
To view the log in its entirety, open the log file using a text editor.
NLS 5.33 and before
The Log view will display the first 100 events in the log file.The Enable NLS Email Service option allows for controlling which NLSService Host can run the emailer service to limit the use of computing resources in a farm of servers. Selecting Enable NLS Email Service will allow the NLSMailService.exe to execute on this service host (this is the default behavior). Selecting Run Mail Service Only will allow NLSService to only run NLSMailService.exe and no other services.Email/SMS Notifications
Click Email/SMS Notifications in the Advanced Options dialog to configure NLSServiceHost to send an email or SMS text message when an error, warning, or success conditions occur.
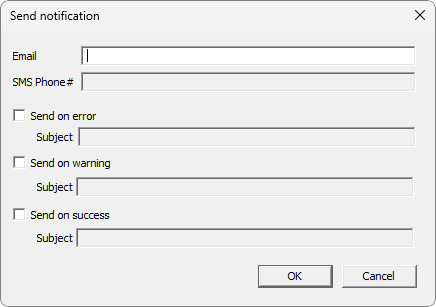
SMS notifications are sent via email. Enter the email address for the carrier shown below substituting cellnumber with the actual phone number (e.g. 15555555555@txt.att.net).
Carrier Email Address AT&T cellnumber@txt.att.net Verizon cellnumber@vtext.com T-Mobile cellnumber@tmomail.net Sprint PCS cellnumber@messaging.sprintpcs.com Virgin Mobile cellnumber@vmobl.com US Cellular cellnumber@email.uscc.net Nextel cellnumber@messaging.nextel.com Boost cellnumber@myboostmobile.com Alltel cellnumber@message.alltel.com Option Comments Send on error A notification is sent when an error occurs. Send on warning A notification is sent when there are CPU/database utilization errors or when a service fails to start two times in a row (an error message is sent when a service fails to start the third time). Send on success A notification is sent when a job has completed successfully. The service host itself does not send success notifications. - Proceed with the configuration under NLS Service in System Setup to set up your accrual automation.
Setting up Scheduled Services
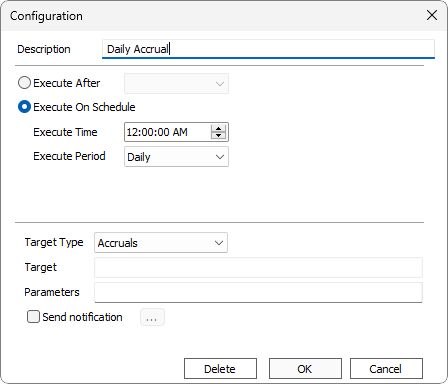
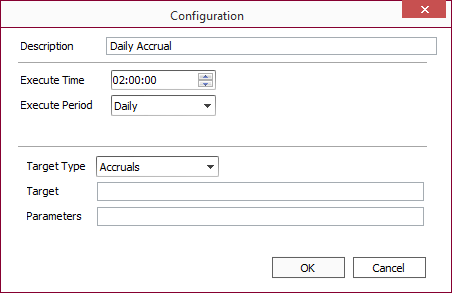
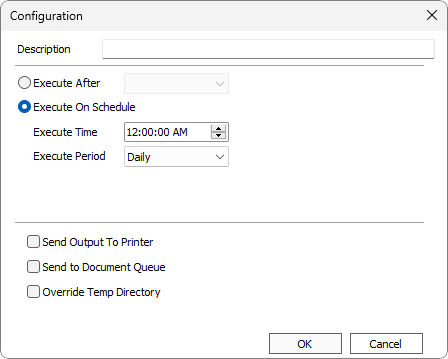
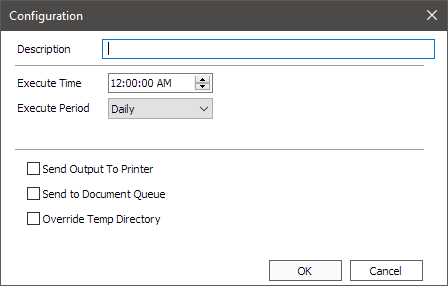
In Setup > System > NLS Service, click Add  to add a new scheduled process. In the configuration window, enter a description and the desired time of execution.
To delete an existing scheduled service, select the service and click Modify  then click Delete.
See the sections below for configuring NLS Service for different target types.
Notifications
Some scheduled services can be configured to send an email notification on an error, warning, or success condition. This option is only available if an email server is configured as the default email server in Setup > System > Communication. Select Send notification, if available, and click  to configure this option. See the Email/SMS Notifications section above for details on using email to send SMS text messages.
To schedule acrruals, select Accruals from the Target Type drop down list and configure the parameters as described below.
Parameters
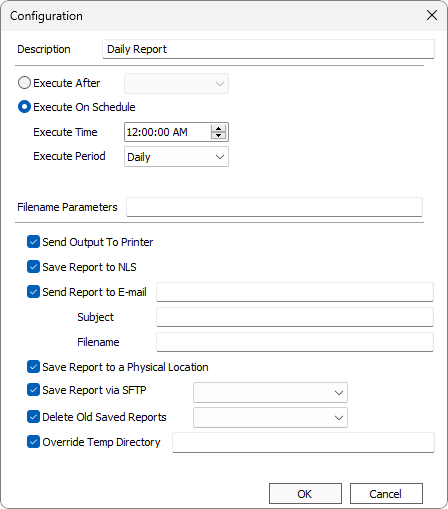
To automate the generation of reports in NLS through the NLS service, first follow the steps above to make sure that the NLS Service is enabled. Then create a Stored Parameter for the report that you want to schedule. See section on Reports for more information.
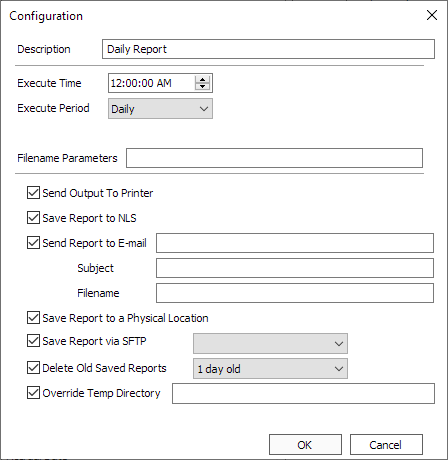
Right-click on the Stored Parameter and select Schedule In Service. Fill in the parameters to schedule your report and click OK.
Options
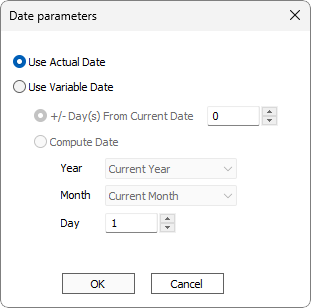
Any parameter that is date dependent (e.g. Starting Date, Ending Date) can be edited by clicking  next to that parameter. The parameter can be set to be equal to the current date on which the report is being run, or can be set to a date relative to the date on which the report is being run.
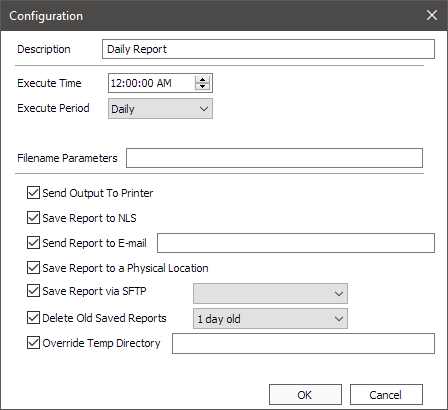
Right click on a pre-defined statement code and select Schedule in Service. Fill in the parameters and select Send Output to Printer or Send to Document Queue and click OK.
Send Output to Printer and Send to Document Queue are mutually exclusive and only one can be selected.
Send Output to Printer cannot be used in the Switch environment.
To automate the updating of Collection campaigns through the NLS service, first follow the steps above to make sure that the NLS Service is enabled. Then create a collection campaign that you wish to schedule.
Right-click on the campaign and select Schedule.
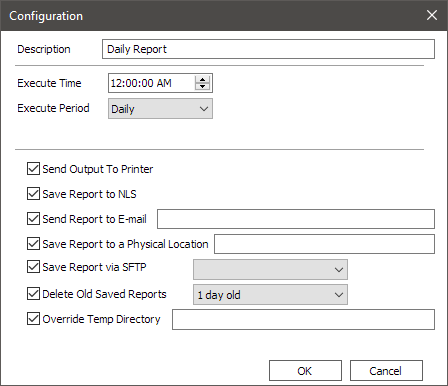
The scheduling parameters for the collection campaign are identical to those used for scheduling a report.
To schedule the ACH processing (for ACH payments only—processing of vouchers to ACH cannot be automated through the Service), Select ACH from the Target Type drop down list and configure the parameters as follows:
Parameters
Example
For the command line:/H=1 /N=-1 /M=+1 /F=c:\achfolder\A%y%m%d.txt
When the ACH executes automatically on November 6, 2022, the ACH Header with a code number of “1” will be used to create the header record in the NACHA file, the ACH will run for all payments with execute dates from November 5th up to November 7th, and the NACHA file will be created in the C drive of the computer, in a folder called achfolder with a file name of A221106.txt.
To schedule the generation of a credit bureau Metro 2 file generation, select Credit Bureau Report from the Target Type drop down list and configure the parameters as follows:
Parameters
| Parameter | Notes |
|---|---|
/H = header ID |
Credit Bureau Header code. Required |
/F = filename |
Location and name of the output file. Required Note This parameter is not supported on our Switch environment for ASP customers. The file can be retrieved via SFTP.The file name may be formed from the following variables:
|
/X5.16+
|
Sets the Total Past Due and Total Current Due values to zero. The loan’s account status must be CLOSED and the payoff/closed date must be before the Metro 2 generation date. |
/Q5.29+
|
The overriding credit bureau ID as configured for a branch to which to generate the report. Has no effect if overriding ID is not configured for a branch. Valid values:
0 = <ALL> (Report is generated using the identification number as configured for the credit bureau header. Default value.) 1 = Equifax 2 = Experian 3 - TransUnion |
To schedule the processing of payment cards by loan groups, select Credit Card or Card from the Target Type drop down list and configure the parameters as follows:
Parameters
| Parameter | Notes |
|---|---|
/G = loangroup number |
List of loan groups. Multiple loan groups should be separated with a comma. Optional |
/M = +/- day |
Set the Execute Date To +/- from system date. Optional |
Note
For more information on usage of this feature, please contact your Nortridge representative.To interface the general ledger using an external DLL, select GL Interface Wrapper from the Target Type drop down list and configure the parameters as follows:
Parameters
| Parameter | Notes |
|---|---|
/F = Filename |
Location where to store the file. |
To schedule the transmission and fetching of data for NCOA processing, select NCOA from the Target Type drop down list and configure the parameters as follows:
Parameters
| Parameter | Notes |
|---|---|
/X or /x = Transmit |
Transmits the name and address of contacts in NLS that is not specifically excluded from NCOA processing to the NCOA server. Note The transmitted list of contacts is tested against the “change of address” data retrieved from the USPS. It is strongly recommended that transmitting the list of contacts be done no more than once per month to avoid overwhelming the NCOA server. |
/F or /f = Fetch |
Fetches the NCOA processing results from the NCOA server and presents it in Processing > NCOA. Note Allow at least 2 hours from the time of the last Transmit operation before fetching the results. |
NLS 5.25 and before
Select Others as the Target Type. Enter the full path to the NLSCreditDisputeProcessor.exe helper application and the required parameters for connecting to the database.Parameters
| Parameter | Notes |
|---|---|
/T or /t = DB Type |
MSSQL (also MSSQLSERVER) or ORACLE. |
/S or /s = Server |
Name of the database server. |
/D or /d = Database |
Name of the database. |
/U or /u = Username |
Username to log into the database. |
/P or /p = Password |
Password for username. |
To configure NLS Service to use Windows Authentication in lieu of specifying the /u and /p parameters, open the Services app (enter Windows Services in the search field in the Task Bar to find the Services app). Right click on NLS Service Host in the list of running services. In the Log On tab, click This account and enter your Windows Authentication credentials. Click Apply to save the changes.
To schedule the archiving of loans with the ARCHIVE status code, select Archive from the Target Type drop down list and configure the parameters as follows:
Parameters
| Parameter | Notes |
|---|---|
/R
|
Maximum runtime in minutes. Required only if /E is not specified |
/E
|
End time in HHMM or HH:MM 24-hour format. Required only if /R is not specified |
/A
|
Archive server override. Optional |
/B
|
Archive database override. Optional |
/X
|
Max CPU use percentage (default is 80, range is 10 – 99). Optional |
/Y
|
Check CPU every Y minutes (default is 1, range is 0 – 60, use 0 to turn CPU monitor off). Optional |
/N
|
Include an “In Progress” log entry every N loans archived in the target database's ArchiveLog table. Set to 0 to disable logging. Setting this value to 100 or less may degrade performance. Optional |
To schedule the processes required for bankruptcies, select Bankruptcy Notifications or Bankruptcy Subscriptions from the Target Type drop down list.
Bankruptcy Notifications will execute NLSBKSubscriptions.exe to send a list of contacts in NLS to BankruptcyWatch.
Bankruptcy Subscriptions will execute NLSBKNotifications.exe to process the notifications from BankruptcyWatch and import the details into NLS.
To schedule SFTP Listener for automated payments processing, select SFTP RFP from the Target Type drop down list and configure the parameters as follows:
Parameters
| Parameter | Notes |
|---|---|
| /F | Path to a local directory where the remote files are temporarily saved. Local copies are deleted after processing. |
| /R | Remote directory. |
| /X | Remote archive. Path to remote directory to where post processed files are moved. Optional. |
| /K | Path to a local directory where the decrypted files are temporarily saved. Optional. If undefined, /F will be used. Local copies are deleted after processing. |
| /A | Use NLS ACH/AFT SFTP settings to connect. If defined, /I, /O, /N, or /C are not used. If the SFTP Name contains a space, use ID#. |
| /I | SFTP host. /O, /N, and either /C or /Q are required. |
| /O | SFTP port number. /I, /N, and either /C or /Q are required. |
| /N | SFTP username. /I, /O, and either /C or /Q are required. |
| /C | SFTP password. /I, /O, and /N are required. |
| SFTP SSH private key file. /I, /O, and /N are required. /C is required if the private key is encrypted. | |
| /H | ACH/AFT header to use. SFTP settings are optional if stored in header. |
| /E | Do not delete temporary local files after processing. |
NLS 5.25 and earlier
See Automated Payments Configuration for information on how to set up the SFTP Listener to automatically check for ACH/AFT return files.To schedule ACH disbursements, select ACH Disbursements from the Target Type drop down list and configure the parameters as follows:
Parameters
| Parameter | Notes |
|---|---|
| /A | Disbursement account ID. Required. -2 = pre-select (vouchers with pre-assigned disbursement accounts). |
| /H | ACH header code. Required. |
| /B | D = debit. C = credit. B = both. |
| /W | Number of days from the system date to the Pay Date To date. Optional. -1 for Pre-select voucher. |
| /M | Number of days from the system date to set the Post Date To date. Optional. |
| /N | Number of days from the system date to set the GL Date From date. Optional. |
| /L | Acctrefno. Execute only on the loan matching the specified acctrefno. Optional. |
| /F | Full path to a local directory where the files are saved. |
To schedule the submission of MailSource files, select MailSource from the Target Type drop down list and configure the parameters as follows:
Parameters
| Parameter | Notes |
|---|---|
| /I | Name of the documents to process. Required. |
Example
/I="STATEMENT 1","STATEMENT 2"If a document name contains a double quotation mark, escape the inner double quotation mark with a backslash.
/I="STATEMENT 1","STATEMENT 2","Merged \"Boston District, Manager's\" Template"
Available only with the loan origination module.
To schedule a scan of loan applications to expire, select LOS Expiring App from the Target Type drop down list.
NLS Service will scan outstanding loan applications and expire those that have been inactive for the number of days specified in setup since the application was created.
NLS Service can be configured to run an external application by setting the Target Type to Others and specifying the full path to the .exe file in the Target field. The values in the Parameter field will be passed to the external application.
The following parameters may be used to connect to a NLS database.
| Parameter | Notes |
|---|---|
/T or /t = DB Type |
MSSQL (also MSSQLSERVER) or ORACLE. |
/S or /s = Server |
Name of the database server. |
/D or /d = Database |
Name of the database. |
/U or /u = Username |
Username to log into the database. |
/P or /p = Password |
Password for username. |
