Contact Type
NLS has 150 standard user-defined data entry fields available for use on every contact. There are 50 on each of three forms: Detail, Demographics, and Financials. Additionally, UDF #51 to #55 are available for use in a grid.
NLS 5.13 and later
UDF #56 to #80 has been added to each form for a total of 225 UDFs. The additional 25 UDFs on each form are hidden by default.Each contact is placed into one of the available contact types. To add a new contact type, click Add  and enter the contact code and description for the new contact type.
Note
If no new contact types are created, all contacts will be classified as <DEFAULT>.There are also 16 additional user-defined fields for use with contact address book entries.
Each type has its own unique configuration for the 150 Contact User-Defined Fields. The label and type of each user-defined field is defined on the Contact Type sub-category under Contact Setup.
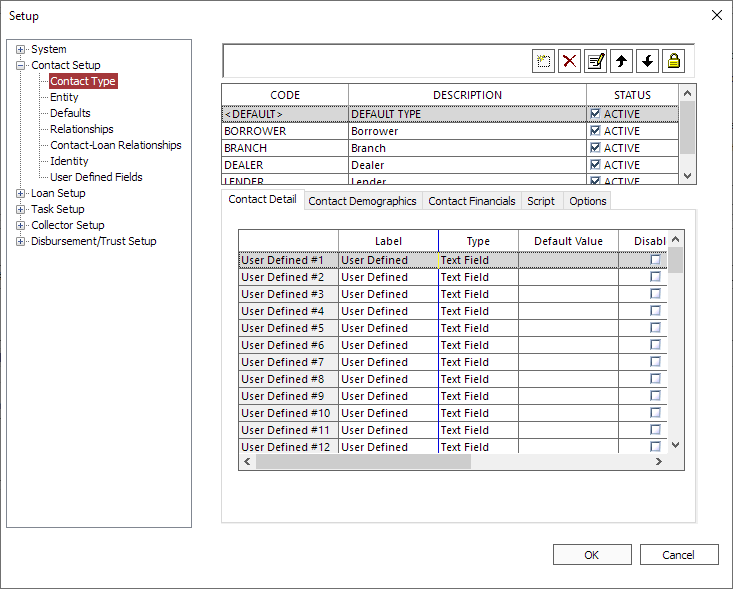
To select which of the three forms of the user-defined fields (Detail, Demographics, or Financials) to modify, click on the appropriate tab.
For the Label, type in the label as you want it to appear on the screen next to the corresponding user-defined field.
For the Type, click on the field then click  and select the appropriate type for the user-defined field from the drop down list.
Select Disabled, Required, Hide, Read Only, and Mixed Case as needed for the user-defined field.
Click  to open a User-Defined Field Setup window for additional configuration options. See User Defined Field Attributes for additional information.
In addition to the configuration of the user-defined fields, contact types also control the security access to the contacts within each type. Click Trustee  to designate which users are allowed access to the contacts in a particular contact type.
 and
and  down to move the selected contact type in the list.
Options Tab
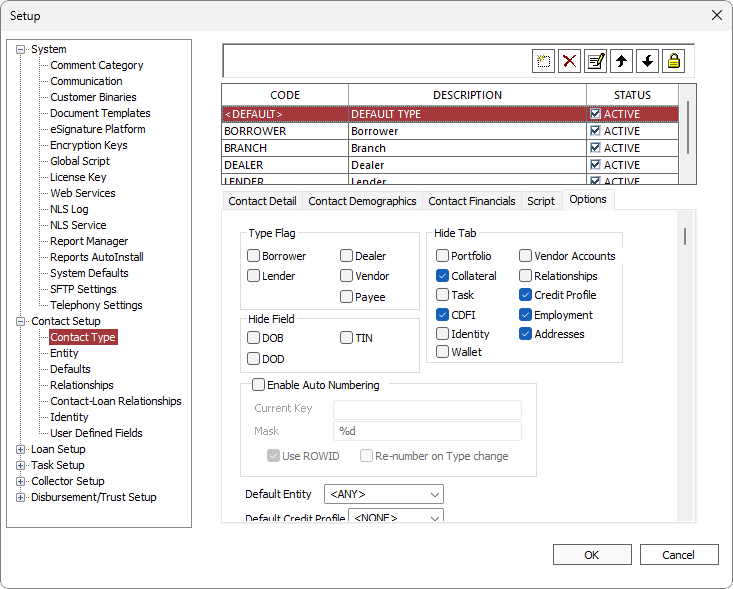
| Type Flag | Designating a contact type with a type flag allows the contacts of that type to link to the corresponding task manager relationship codes. | |||||||||||||
| Hide Tab | Selecting the name of one of the standard tabs on the contact will hide that tab for all contacts that are set to this contact type. | |||||||||||||
| Hide Field |
The Date of Birth (DOB), Date of Death (DOD)*, and the Tax ID (TIN) fields may be hidden on all Contacts that are set to this contact type. *DOD available in NLS 5.0.3 and later |
|||||||||||||
| Enable Auto Numbering |
If Enable Auto Numbering is selected, you may set the auto numbering to be keyed to the reference number (ROWID) of the contact, or to a key that you set, which will iterate as each contact is added.
|
|||||||||||||
| Default Entity | An Entity Code may be set up to be the default code for all contacts added using this contact type. | |||||||||||||
| Default Credit Profile | A credit bureau may be set up to be used as the default credit profile for all contacts added using this contact type. | |||||||||||||
| When enabled, this contact type can be selected as the Contact Type when entering a new Paid By Other contact information in the advanced transaction entry dialog. | ||||||||||||||
| When enabled, the related comments of a loan will also include comments from a contact related to the loan via a contact to loan relationship and the related comments of a contact will also include comments from a contact related to the contact via a contact to contact relationship. |
Export / Import
To export a contact type to an XML file, right-click the contact type to export and select Export to file. Enter a name for the file and select where to save then click Save.
To import a contact type from an XML file, right click anywhere in the list of contact types and select Import from file. Select the file to import and click Open.
