Starting NLS for the First Time
When using Nortridge Loan System for the first time, follow these steps:
1. Double click the NLS.exe icon. NLS.exe can be found in the bin folder of your NLS installation (e.g. C:\Program Files (x86)\Nortridge Software\NLS\bin).

2. Because you have never logged on before, you will get a message indicating that the Database Connection Map File (DCM) does not exist. The DCM file, named nort.dcm, will be created at C:\Users\username\AppData\Roaming\NLS\ and is used to store all of the information needed by NLS to connect to your database.

3. Click OK.
4. Now, you will be brought to the Connect window. The OK button is disabled because there are no connections defined.
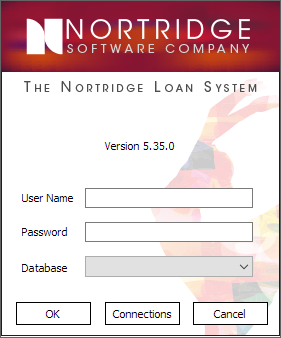
5. Click Connections.
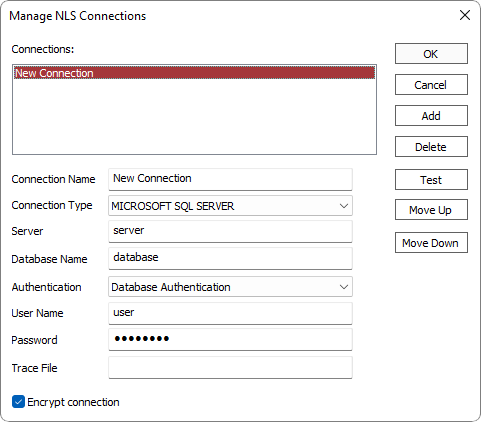
You are brought to the Manage NLS Connections window.

6. Click Add.
A default name is given to your new connection. You may change the connection name if you wish.

7. Select your type of database from the Connection Type drop down list. If you are using SQL Express select Microsoft SQL Server.

8. Fill in the rest of the parameters as follows:
Server
|
SQL Express |
Use the computer name\sqlexpress |
|
Microsoft SQL Server |
Use the Server Alias name that is specified in SQL Server Client Network Utility. |
|
Oracle |
Use the Service Name that is specified in Oracle Net8 Easy Config. |
Database Name
|
SQL Express |
Enter the desired database name (e.g. NLS). |
|
Microsoft SQL Server |
Enter an unused database name (e.g. NLS) to automatically build a new database or use the name of the database that was previously created in Enterprise Manager/Management Studio. |
|
Oracle |
Not Applicable. |
Authentication
|
All Database Types |
The authentication type determines if a user’s log in authentication will be based on a user name and password stored in the database (database authentication) or if the user’s Windows network profile will be used (Windows authentication). In the case of Windows Authentication, the user MUST be set up in security with a user name that exactly matches their Windows login. In this case, upon launching NLS, the user will be logged into the proper account within the NLS database which matches the account with which they are currently logged into Windows. |
User Name
|
SQL Express |
Enter the desired user name for the database, nortridge is a typical setting. |
|
Microsoft SQL Server |
Enter the desired user name for the database if using the auto build feature, or use the name of the user that was created in Enterprise Manager if the database was built manually. |
|
Oracle |
Use the name of the user that was created in Security Manager. |
Password
|
SQL Express |
Enter the correct password for the account specified in User Name. |
|
Microsoft SQL Server |
Enter the correct password for the account specified in User Name if using auto build, or use the password that was specified for the user created in Enterprise Manager. |
|
Oracle |
Use the password that was specified for the user created in Enterprise Manager. |
Trace File
This specifies the location for a data call output file. The information in the file can be quite useful in debugging problems and in aiding technical support. A typical location would be:C:\Program Files\Nortridge Software\NLS\TMP\Nls.out

Encrypt Connection
Select Encrypt connection if the database has its Setup > System > System Defaults > Encrypt SQL Connection enabled.
The specified Server name must be the actual server name. Aliases will not work.
The certificate must be installed on both the database server and on the client computer.
To configure the client computer with a certificate:
-
Copy either the original certificate or the exported certificate file to the client computer.
-
On the client computer, use the Certificates snap-in to install either the root certificate or the exported certificate file.
-
Using SQL Server Configuration Manager, right-click SQL Server Native Client Configuration and select Properties.
-
On the Flags page, in the Force protocol encryption box, click Yes.
9. Click OK to save the new settings. You are brought back to the Connect screen. Enter admin for your user name and admin for your password.
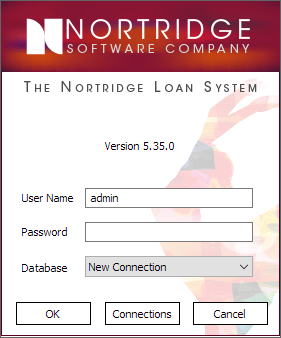
10. Click OK.
11. If the database specified has not been created yet, NLS will open the database builder dialog.

12. All of the fields should automatically populate except the password for the administrative account. Enter the password and click OK. If you are using MSDE the password will be nortridge.
13. Once the database has been built, NLS will open a dialog informing you the database was created successfully.

14. Click OK. NLS will be shut down.
15. Double click the NLS icon to re-start the application. The connection screen will open up.
16. Enter admin for the user name and password and click OK.
If the database schema needs to be updated, it will be updated at this point.

A prompt to run the updater unattended will appear.


17. NLS will prompt you to enter a new password. Type your desired password into the password and confirm password fields and click OK.
Tip
A password can have a maximum length of 22 characters and may consist of uppercase (ABC…), lowercase (abc…), numeric (123…), or symbols (!@#…).For NLS versions prior to 5.23, the maximum length allowed is 18 characters.

18. Since you have never logged on to this database before, your license key will need to be validated.

19. Click Browse… and navigate to where your license key is located.

20. Select the license.key file and click Open.
21. Verify the loaded license key information and click OK.
Now you will be taken to the main NLS environment.
