DocuSign Webhook
Licensed users running NLS on their own database servers will need to install the DocuSign webhook on their own servers.
Installation
Step 1
Download and install the latest .NET 5 ASP.NET Core Runtime & Hosting Bundle for Windows.
Step 2
Copy the docusignwebhook folder to the IIS root folder (typically C:\inetpub\wwwroot\).
For NLS 5.39 and later, please contact Nortridge Support to obtain the required DocuSign webhook files.
For NLS versions prior to 5.39, the docusignwebhook folder is installed during the Nortridge Client installation and is located at c:\Program Files (x86)\Nortridge Software\NLS\docusignwebhook.
Step 3
Open the appsettings.json file with a text editor.
Note
The text editor may need to be run as administrator to allow it to save the file.The unedited file should look like this:
Unedited appsettings.json
{
    "ConnectionStrings": {
        "Default": {
            "ConnectionString": "",
            "Type": ""
        }
    },
    "NlsDllPath": "C:/Program Files (x86)/Nortridge Software/NLS/bin/",
    "Logging": {
        "LogLevel": {
            "Default": "Warning"
        }
    },
    "AllowedHosts": "*"
}
For Microsoft SQL Server, add the following to the ConnectionString parameter where:
- Data Source = name of the database server;
- Initial Catalog = name of the database;
- User Id = username for the database;
- Password = password for username;
Set Type to MSSQL.
MSSQL appsettings.json
{
    "ConnectionStrings": {
        "Default": {
            "ConnectionString": "Data Source=SERVER_NAME; Initial Catalog=DATABASE_NAME; User Id=DATABASE_USERNAME; Password=DATABASE_PASSWORD",
            "Type": "MSSQL"
        }
    },
    "NlsDllPath": "C:/Program Files (x86)/Nortridge Software/NLS/bin/",
    "Logging": {
        "LogLevel": {
            "Default": "Warning"
        }
    },
    "AllowedHosts": "*"
}
For Oracle, add the following to the ConnectionString parameter where:
- User ID = username for the database;
- Password = password for username;
- Data Source = Oracle TNS format or TNS alias;
Set Type to ORACLE.
Oracle appsettings.json
{
    "ConnectionStrings": {
        "Default": {
            "ConnectionString": "User ID=DATABASE_USERNAME; Password=DATABASE_PASSWORD; Data Source=(DESCRIPTION=(ADDRESS=(PROTOCOL=tcp)(HOST=SERVER_NAME)(PORT=1521))(CONNECT_DATA=(SERVICE_NAME=ORACLE_SERVICE_NAME)))",
            "Type": "ORACLE"
        }
    },
    "NlsDllPath": "C:/Program Files (x86)/Nortridge Software/NLS/bin/",
    "Logging": {
        "LogLevel": {
            "Default": "Warning"
        }
    },
    "AllowedHosts": "*"
}
Save the changes.
Step 4
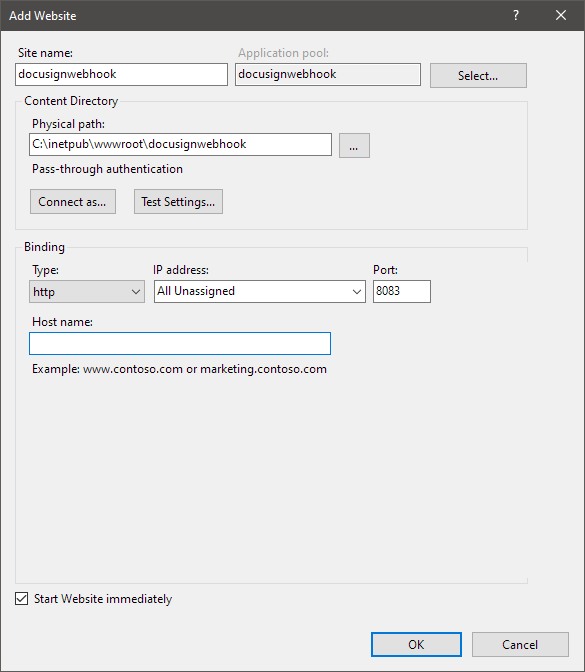
Open the Internet Information Service (IIS) Manager application. Right click on the Connections pane and select Add Website….
Enter the site name and specify the physical path to the docusignwebhook folder.
Click Connect as… and specify credentials to use if needed.
In the Binding section, select http for Type for an unsecured connection and specify a port number or select https for Type for a secured SSL connection.
Step 5
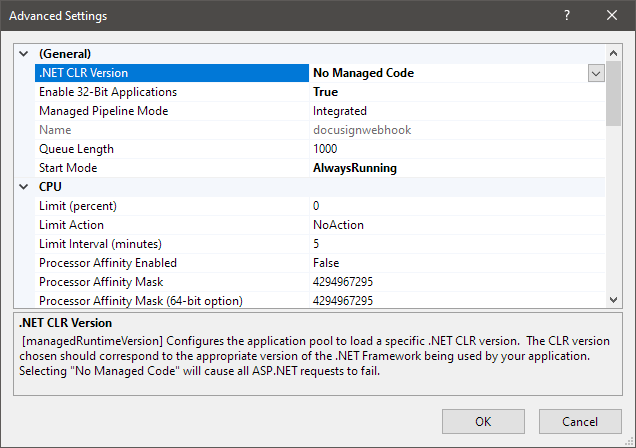
Go to Application Pools and select docusignwebhook. Click Advanced Settings… and set .NET CLR Version to No Managed Code, Enable 32-Bit Applications to True, and Start Mode to AlwaysRunning.
Step 6
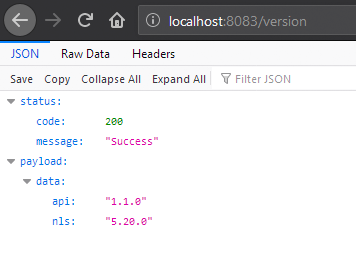
Open http://localhost:8083/version in your web browser to verify that the webhook is running.
Step 7
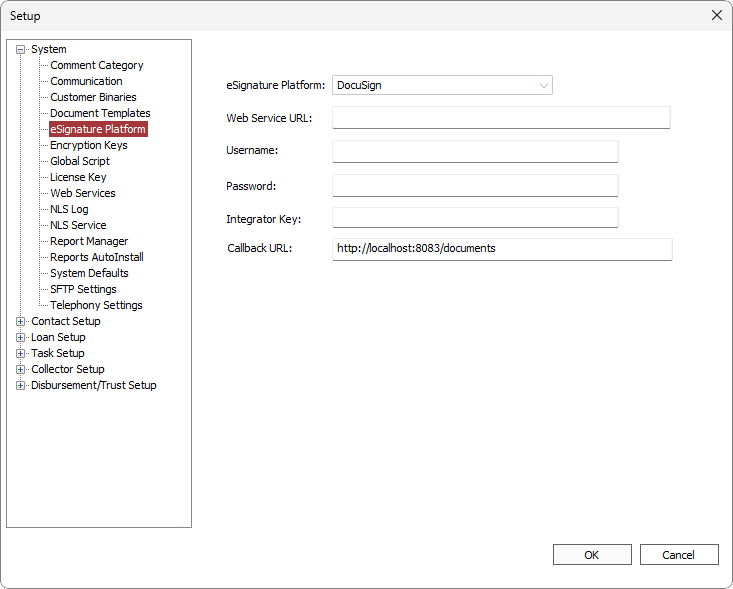
Before the URL can be used in NLS, append “/documents” to the website address. The URL should now be in the form of:
http://<IIS-website-path>/documents
where <IIS-website-path> in this example is localhost:8083. Enter this URL in the Callback URL field in the eSignature Platform setup.