Disbursement / Trust Setup
The Nortridge Loan System has the ability to generate vouchers and print checks. These checks can be used for loan disbursements, to pay taxes and insurance through the Escrow Module, to refund overpayments, and to pay other vendors.
Before checks can be printed, general setup related to your checking account and check stock must be configured. To access the global configuration for disbursements, go to Setup > Disbursement/Trust Setup.
Disbursement/Trust Setup consists of three areas:
Trust Account
Information on your checking account and your check stock is configured on the Trust Accounts Setup screen.
Click  Add and enter an account name and description for your disbursement account then click OK.
NLS 5.4 and later
Account Tab
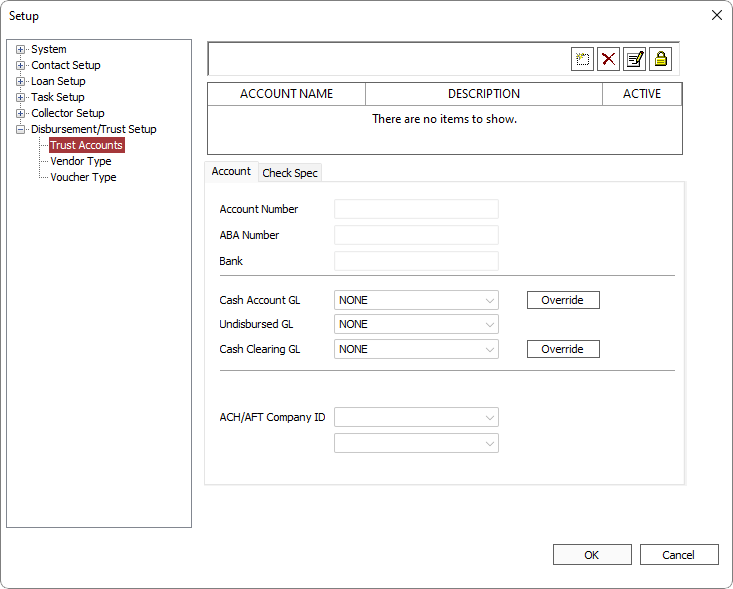
Enter the Account Number and ABA number for your checking account.
NLS 5.30 and later
Click to select which users/groups will be able access the selected account.
Privilege for the trustee configuration is set in DISBURSEMENTS > Setup > Disbursement Account Setup > Trustee Access Privileges.
Check Spec Tab
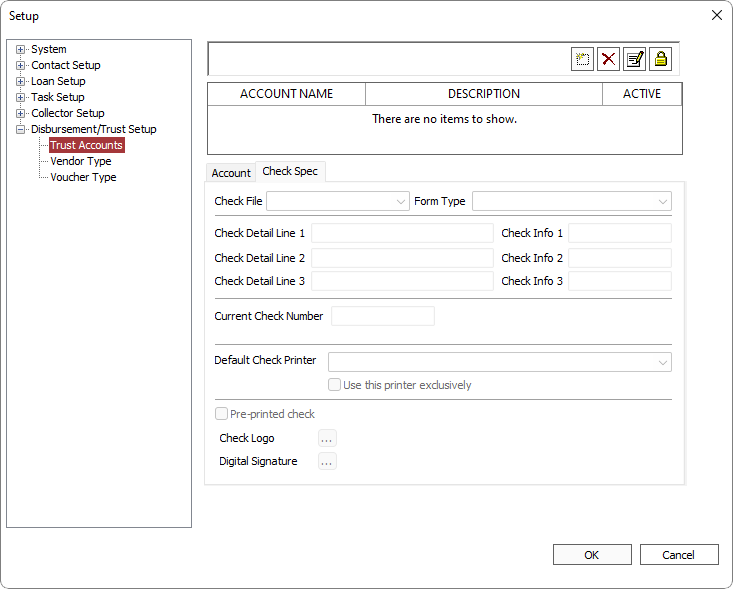
Select the appropriate entries in the Check File and Form Type drop down lists. NLS has been pre-configured to include a number of check formats, and is also capable of using pre-printed checks. If your check stock is not included, and you would like your system customized to include your check stock, contact Nortridge Software.
| Option | Description |
|---|---|
| Check Detail Line 1 | Typically your company name |
| Check Detail Line 2 | Typically your company address |
| Check Detail Line 3 | Typically the city, state, zip of your company address |
| Check Info 1 | Typically the ABA number |
| Check Info 2 | Typically the first four digits of the routing number |
| Check Info 3 | Depending on your check stock, this line may be blank or may contain a reprint of the account number. |
| Current Check Number | The check number of the last check that was printed out of NLS. |
| Default Check Printer | The default printer to use for printing checks. This may be changed in the Print dialog during check printing. |
| Use this printer exclusively | Available when a Default Check Printer is specified. When selected, the printer selection cannot be changed in the print dialog prior to printing checks and is forced to print on the specified default check printer. This may be used to prevent a user from sending checks to unauthorized printers out of audit controls. |
| Pre-printed check | Select if using pre-printed checks. When selected the detail, info, number, logo, and signature are not printed. Branch ID and User ID will not be printed if this option is selected.5.15+ |
| Check Logo | Click  to select a JPEG, PNG, GIF, or BMP file to print on the check. to select a JPEG, PNG, GIF, or BMP file to print on the check.The space reserved for the image is 3.40 inch wide by 0.75 inch high. For best results use a 300 dpi image or a 1020 x 225 pixel image. A lower resolution image may appear pixelated when printed. Images that do not have the 3.40:0.75 aspect ratio will be stretched to fill the reserved space and will appear distorted when printed. DO – Correct Image Size The entire image is 1020 x 225 pixels with a white background fill. The logo itself can be placed anywhere within this space for desired positioning.
The logo will print correctly without any distortion.
DON’T – Incorrect Image Size The entire image is only as big as the logo and does not have the correct aspect ratio.
The logo will become distorted and print stretched horizontally or vertically.
|
| Digital Signature | Click to select a digital signature JPEG, PNG, GIF, or BMP file to print on the check. The space reserved for the image is 3.00 inch wide by 0.50 inch high. For best results use a 300 dpi image or a 900 x 150 pixel image. A lower resolution image may appear pixelated when printed. Images that do not have the 3.00:0.50 aspect ratio will be stretched to fill the reserved space and will appear distorted when printed. Follow the same guideline for the correct image size as shown above for the Check Logo image but with an image size of 900 x 150 pixels. |


Check Samples
| Form Type | Sample |
|---|---|
| Deluxe 80501 Blank Laser Top Check |
|
| Deluxe 80502 Blank Laser Middle Check |
|
| Deluxe 80503 Blank Laser Bottom Check |
|
| Deluxe 80514 Blank Laser Top Check |
|
| Deluxe 80515 Blank Laser Bottom Check |
|
| Deluxe 81064 Preprinted Laser Top Check |
|
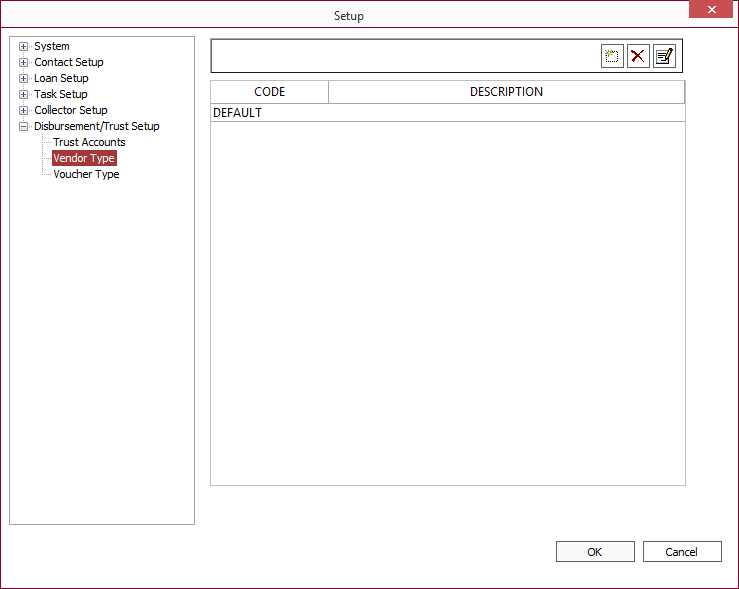
Vendor Type
In the Vendor Type sub-category under Disbursement/Trust Setup, add the vendor codes and descriptions (e.g. Accounts Payable, Insurance Companies, Tax Authorities) so that these codes will be available for use when creating a voucher or setting up an Escrow Account.
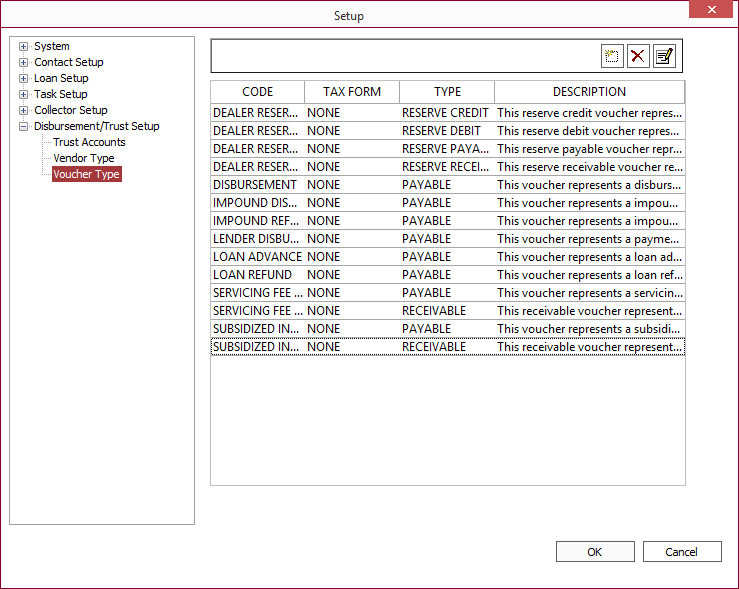
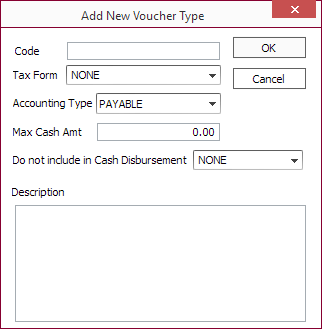
Voucher Type
In the Voucher Type sub-category under Disbursement/Trust Setup, create your Voucher Codes so that they will be available for use when you later generate a voucher or configure an Escrow Setup.