Branch
Available in NLS 4.10.1 and later.
Branch support allows for identifying divisions and branches, separating contacts, loans, and tasks by branch, and controlling user logins.
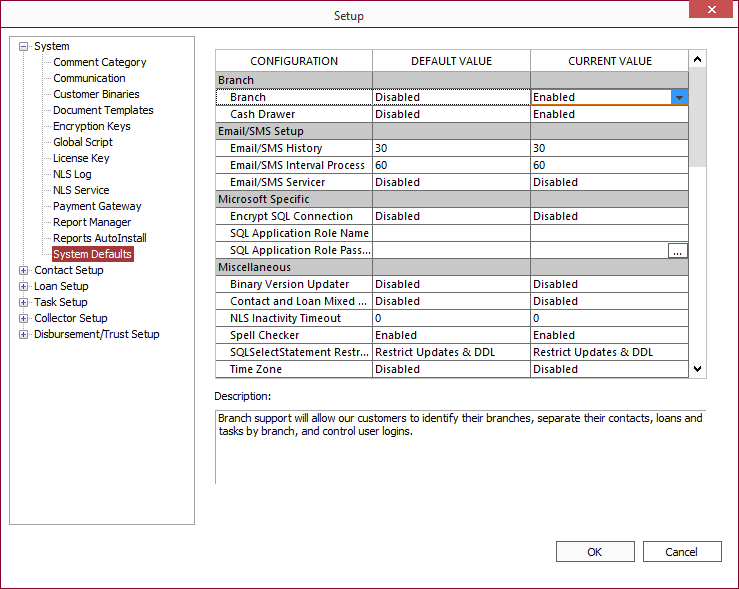
To enable branch control, go to Setup > System > System Defaults. Under Branch sub-section, click on the Current Value cell for the Branch configuration and select Enabled. Click OK to restart NLS.
NLS 4.10.7 and earlier
Branch setting is located under the Miscellaneous section in System Defaults.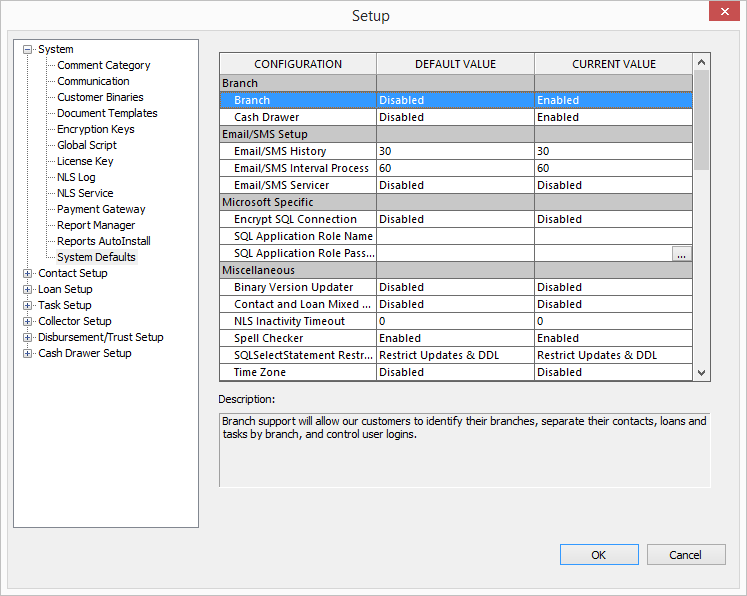
Before assigning security privileges, a Branch contact type must be created and for each branch, a contact must be created.
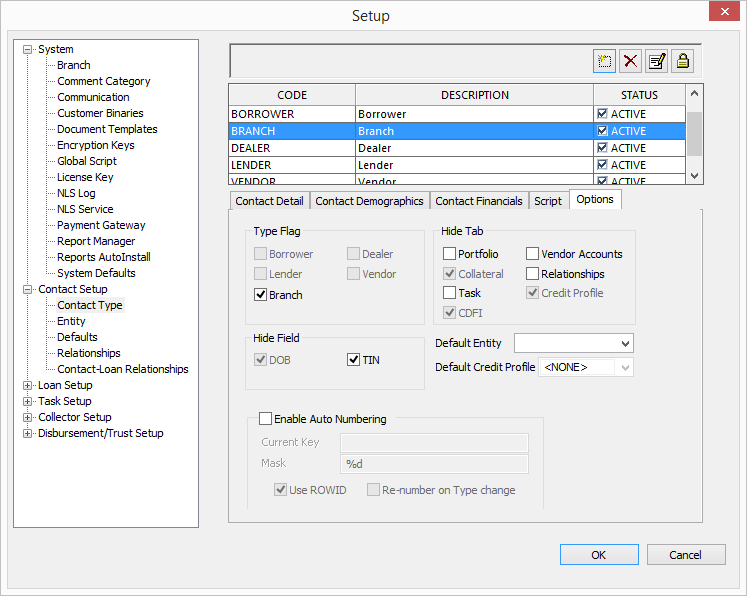
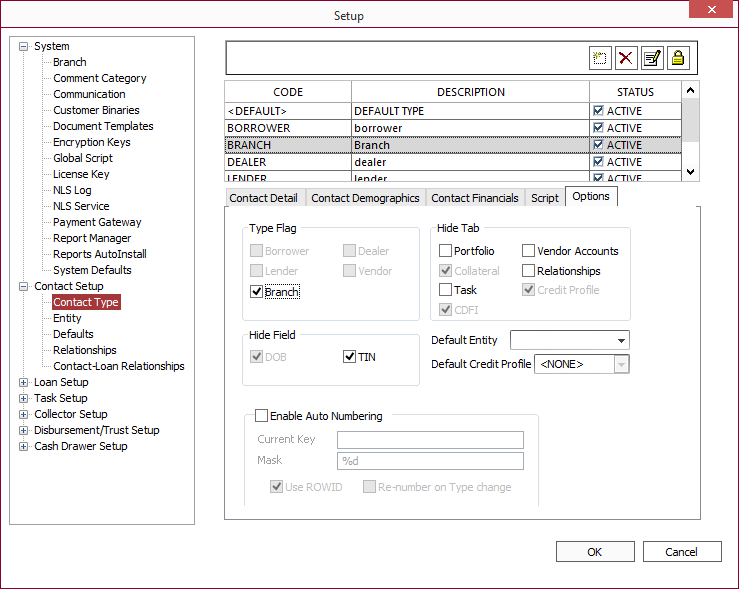
Go to Setup > Contact Setup > Contact Type. Click  and enter a code and description for the branch contact type then click OK.
Click the Options tab and select Branch under Type Flag. Click OK to restart NLS.
Once logged back into NLS, click 
 and select Add Contact. Enter a contact number, shortname, and any other pertinent information for the branch. The shortname will be used to reference this branch. Select the code used for your branch contact type in the Contact Type drop down list and save.
Assigning Branch Security
Go to Setup > System > Branch.
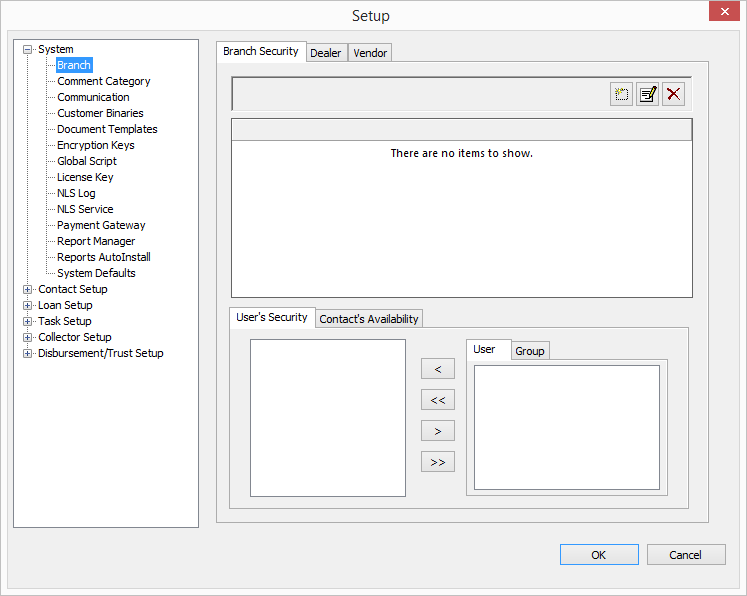
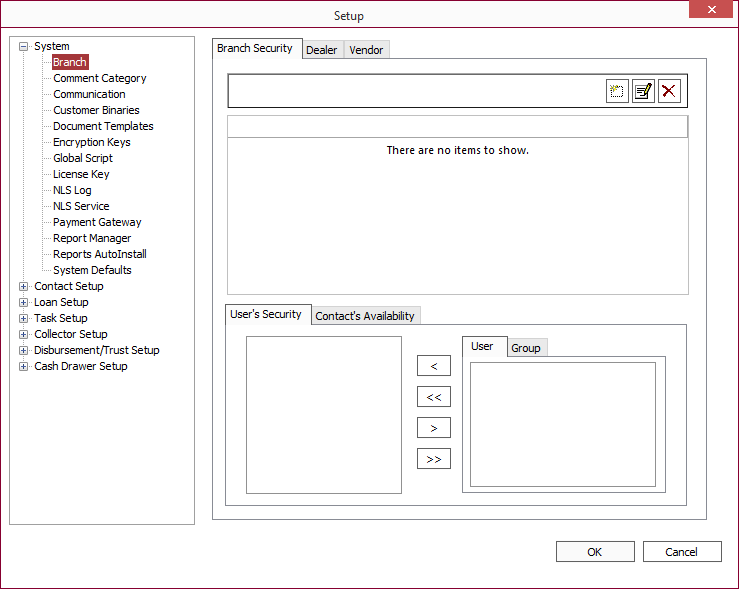
Branch Security Tab
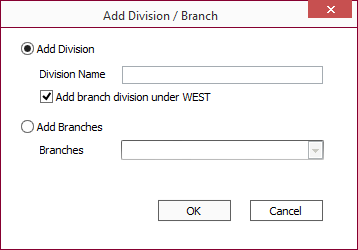
To add a new branch, click .
Select Add Branches and choose a branch contact from the Branches drop down list. Only contacts with a branch contact type will be listed in the drop down list.
To organize branches under divisions, click .
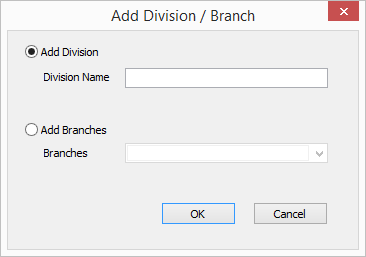
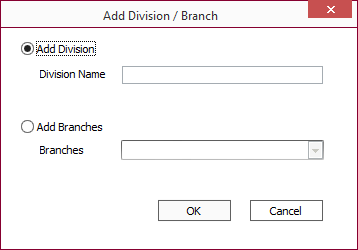
Enter a name for the new division and click OK.
Highlight the division and click to add a branch to the division or to create nested divisions under it.
To create nested divisions, highlight the division to add to and click .
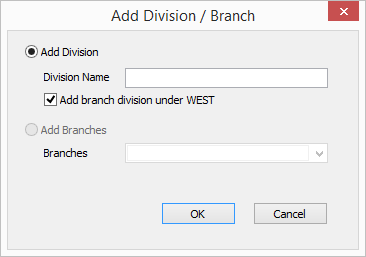
Enter a name for the new division, select Add branch division under <branch name> and click OK. A new division will be created under the selected division.
Click  to edit the name of a division or branch.
Click  to delete a division or branch.
Once branches are created, users can be added to branches or divisions to give that user access to data belonging to those branches.
To add users to a branch, highlight the branch to which to add a user. Under the User’s Security tab, select a user or group from the User or Group tab in the right pane and click 
 . The user or group will move to the left pane giving that user or group access to the selected branch.
|
|
Move selected item to the left pane. |


|
Move all items from the right pane to the left pane. |


|
Move selected item to the right pane. |


|
Move all items from the left pane to the right pane. |
Note
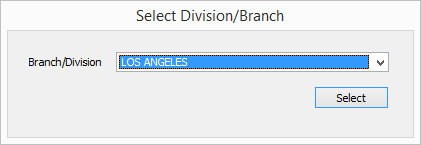
If a user is given access to more than one branch, a dialog will be presented during log in for selecting which branch to log in under. Choose the branch from the drop down list and click Select to log in.If the user is given access to a branch and a division, a <All> option will be available in the drop down list. This option gives the user access to all branches to which the user has access.
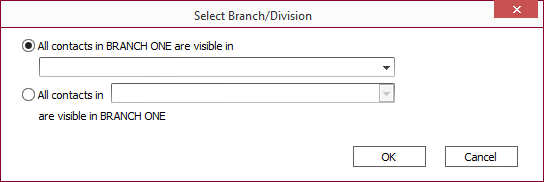
Contact’s Availability tab allows for adding an availability rule to a branch to allow access to its data. By default each branch has access to its own data. To add a new availability rule to a branch, highlight the branch and click . Choose all branches, a division, or a branch to which to give access and click OK. A summary of the contact’s availability is shown in the window.
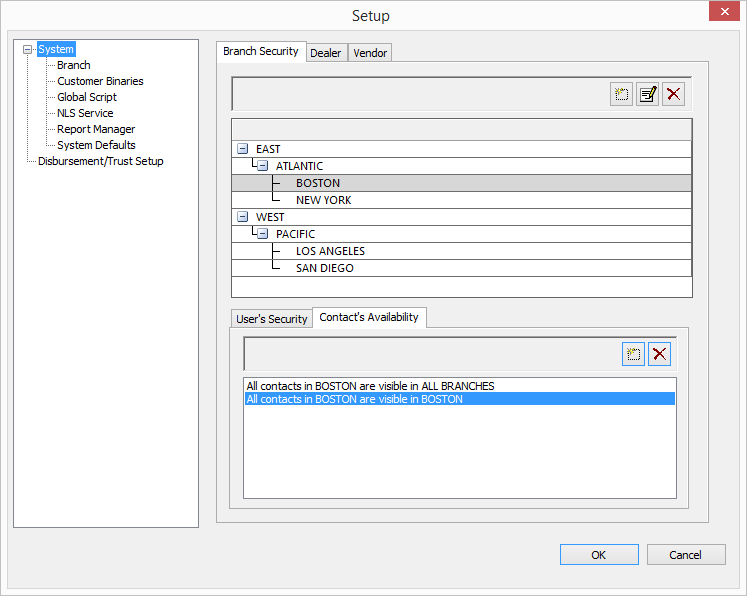
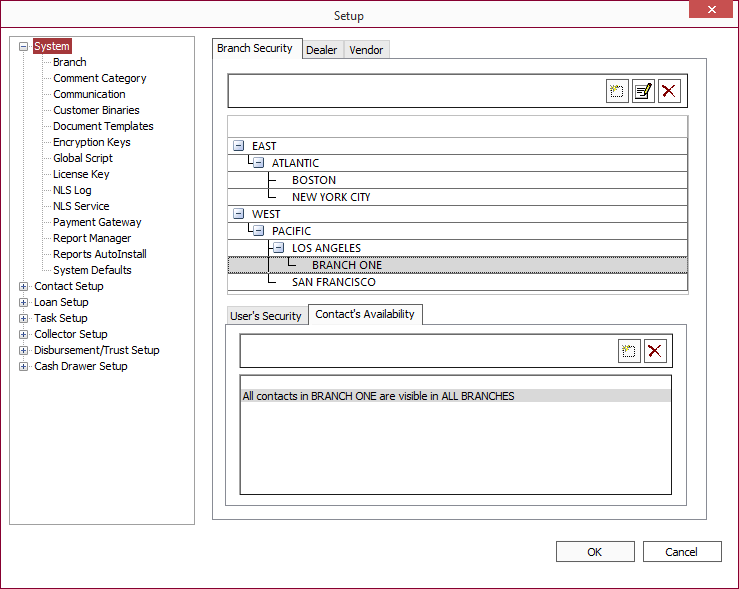
Contact’s availability tab
Dealer Tab and Vendor Tab
The Dealer tab and Vendor tab allows for adding an availability rule to a dealer or a vendor contact type to allow access to the contact within a branch. By default, all dealers and vendors are visible in all branches.
To add a dealer/vendor, click and select a dealer/vendor from the drop down list.


Click OK.
To add an availability rule to a contact, click  next to the contact, select an availability rule and click . Select a rule from the Add Branch drop down list and click OK.
To remove an availability rule from a contact, select an availability rule and click .
Working with Branches
When branches are enabled, all borrower and lender contact type will be assigned to a branch.
Note
If upgrading from a previous version of NLS or using branches for the first time on an existing database, adding a loan to a contact or vendor which is not assigned a branch will result in an error. If this occurs, close the Add New Loan window and choose a branch from the Branch drop down list for the contact or vendor.Branch Trustee Security
User and group privilege to view, update, add, and delete branches can be managed in Security’s System > Branch privilege tree.
NLS 4.10.8 and later
Comments Time Zone
The time zone used to display the time in the comments can be set in Setup > System Defaults > Time Zone. It is disabled by default and can be changed to Hawaii Time, Alaska Time, Pacific Time, Mountain Time, Central Time, Eastern Time, Atlantic Time, Newfoundland Time, or Branch Location Time.
Atlantic time and Newfoundland time added in NLS 5.6.
When disabled, the time stamp in the comments is shown relative to the time zone of the branch where the comment originated.
When set to Alaska, Hawaii, Pacific, Mountain, Central, Eastern, Atlantic, or Newfoundland times, the time stamp in the comments will be shown relative to the set time zone.
When set to Branch Location Time, the time stamp in the comments will be shown relative to the branch location of the current user. The branch location is determined by the State and County values in the branch's address.
Admins are not affected by the Time Zone setting and the time zone, as set, in the computer’s Date and Time setting is used.
When set to a specific time zone, the displayed time in the contact, loan, and collector comments can be toggled quickly between the set time zone and the customer’s time zone by right clicking the comment and selecting either Convert Date to Time Zone in Setup or Convert Date to Customer’s Time Zone respectively. The customer’s time zone is determined by the address of the contact and if no customer address is available or if the user is an admin, the computer’s Date and Time setting is used.
Branch Setup
In the contact tree, select a contact with a contact type of branch and 
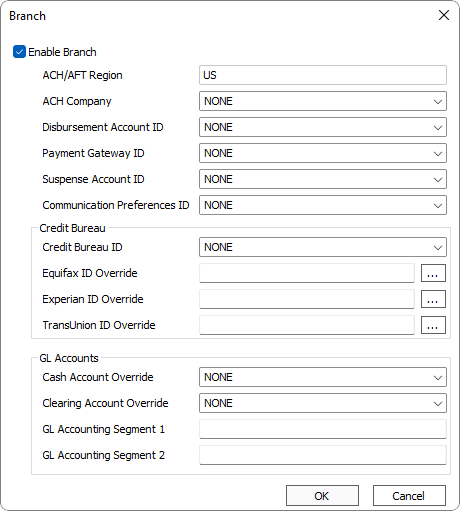
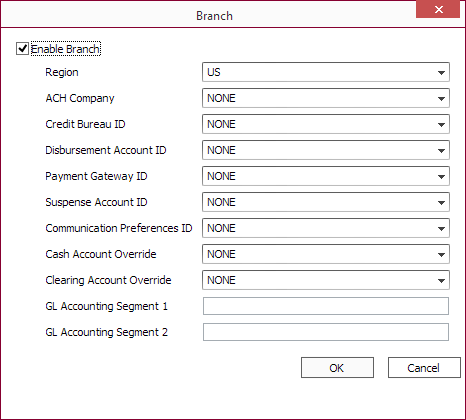
The following items can be configured individually for each branch contact type:
- Region (available when Setup > Loan Setup > Defaults > ACH > Format is set to Both)
NLS 5.7.5 and later
Note
The region setting in loan group setup takes precedence over the region setting in branch setup. - ACH Company ID
- Credit Bureau ID – this is the Credit Bureau Header to use.
- Equifax / Experian / TransUnion ID Override
NLS 5.29 and later
Click to enter the overriding identification number to use for this branch. When this ID override is configured, it can be selected when generating a credit bureau report. This overriding ID—instead of the identification number configured for the specific credit bureau header—will then be used in the credit bureau report.
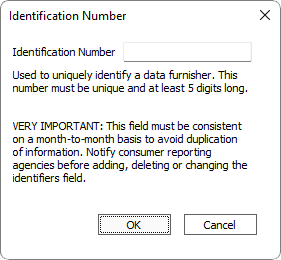
- Disbursement Account ID
- Payment Gateway ID
- Suspense Account ID
- Communication Preferences ID
- Cash Account Override
- Clearing Account Override
- GL Accounting Segment 1 NLS 5.6 and later
- GL Accounting Segment 2 NLS 5.6 and later
