Using Payix with the Borrower Portal
Note
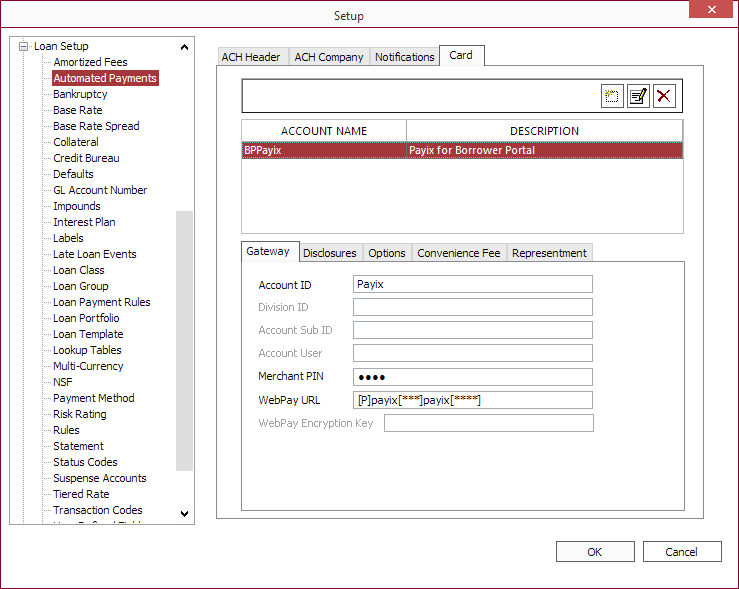
With the acquisition of Payix by REPAY, Payix users should transition to using REPAY as the payment gateway.To process card payments with Payix through the borrower portal, a unique Payix configuration for use specifically with the borrower portal should be created in Setup > Loan Setup > Automated Payments > Card.

All of the data entered here, except for the WebPay URL, is irrelevant as all of the credential required to access Payix will be obtained from the appssetting.json file, covered below, in your borrower portal installation. For the WebPay URL, make sure the string “payix” is included in its definition.
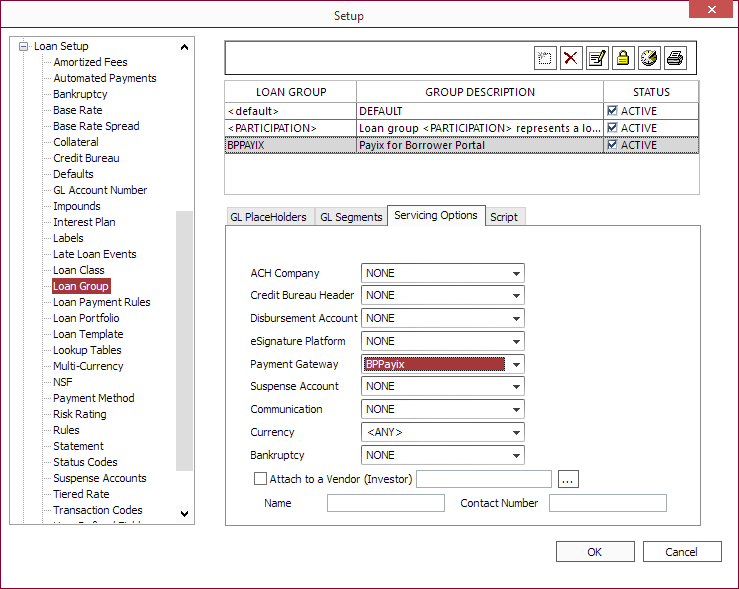
Next, a loan group must be configured or created in Setup > Loan Setup > Loan Group to use the Payix account created above.

Any loan belonging to the configured loan group will now be able to apply payments through Payix.
Update the Borrower Portal appsetting.json file
Borrower Portal 3.0
As of version 3.0, this step is no longer required as the values are read from the NLS Setup.| Username | Username used to authenticate Payix Payment Gateway requests. |
| Password | Password used to authenticate Payix Payment Gateway requests. |
| AllPaymentMethodsUrl | The all-payment-methods Payix API URL. |
| CreatePaymentTokenUrl | The create-payment-token Payix API URL. |
| MakePaymentUrl | The make-payment Payix API URL. |
},
    "Payix": {
        "Username": "payixuser",
        "Password": "password",
        "AllPaymentmethodsUrl": "https://payix/",
        "CreatePaymentTokenUrl": "https://payix/",
        "MakePaymentUrl": "https://payix"
    }
}

