Adding a User-Defined Transaction Code
To add a Manual Transaction code, click Add  . This will bring up the first “page” of the Transaction Code Wizard.
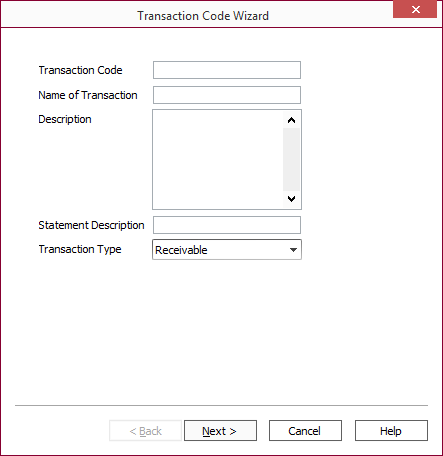
Enter a number for the Transaction Code.
Note
All manual (user-defined) transaction codes must use even numbers greater than or equal to 500. Numbers below 500 are reserved for the default system transactions and odd numbers are reserved for the reversing transactions that are automatically set up along with every transaction code.Enter a name for the transaction, a description, and a statement description. The statement description is the text that will appear on any statement that shows a transaction history.
Select either Receivable or Generic for the Transaction Type. If you select Receivable, then you will be prompted to create an associated Payment transaction to go along with the Receivable transaction that you are creating. If you link the Receivable transaction to a Payment transaction that already exists, the Wizard will skip that step.
Click Next > to bring up the second page of the Wizard.
If your transaction is a receivable, the second page of the Wizard will require you to define the type of receivable. Because a receivable transaction can be set up to bill an amount on a loan without affecting any loan balance (e.g. a transaction which bills interest which has already accrued) the type of balance that this receivable bills must be specified.
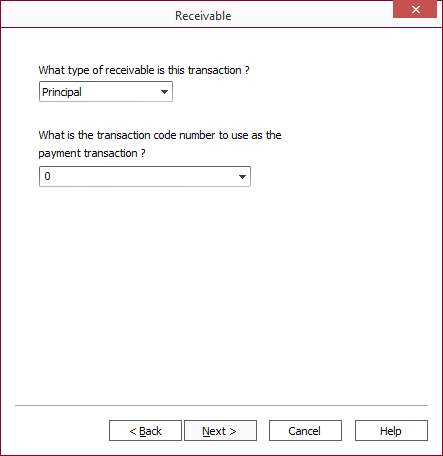
Select the type of receivable from the drop down list. The available types are: Principal, Interest, Late Fee, Fee, Principal & Interest, Principal Balloon, Interest Balloon, and 10 user-defined loan balances. A receivable type of Principal & Interest creates a single receivable with an indefinite principal and interest breakdown. The amount of interest due is defined by the interest balance on the effective date of the payment, and the amount of principal due is defined as the amount of the receivable left over after the interest has been paid.
Select a Transaction Code number to be used as the associated payment for this receivable. This may be an existing payment transaction code selected from the drop down list, or a new transaction code may be entered in the field.
Click Next > to go on to the next page of the Wizard.
The next page of the Wizard will allow you to set the General Ledger Controls for your Transaction Code.
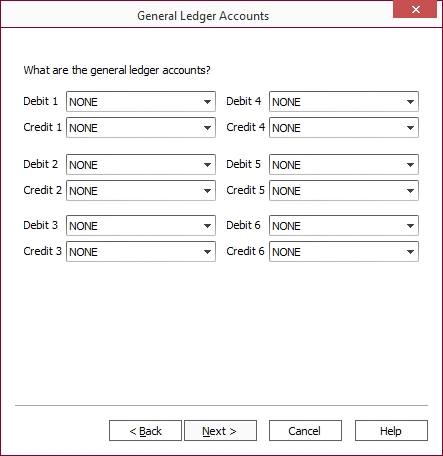
Select the appropriate Credit and Debit accounts from the drop down lists. The lists will include all of the GL accounts that are configured on your loan system, as well as all of the place holders, so that you may configure the transaction to credit or debit a specific account, or to refer to the Loan Group to determine which accounts should be affected.
Click Next > to go on to the next page of the Wizard.
On this page, you will define the Loan Controls (Loan Balances affected; Statistics will be on another page) for your transaction code.
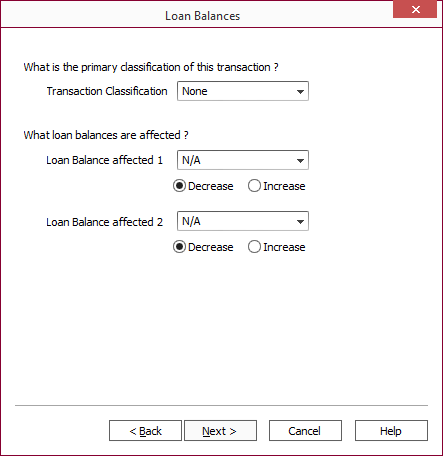
Transaction Classification is used to categorized and identify the transaction code in the ledger and reports. NLS may use it to determine how to act on that transaction code in some situations. For example, a transaction classification of Amortized Fee and Impound are only applied to the main loan of a participation and shadow loans.
Select the loan balance or balances that are to be affected by the transaction, and specify if the transaction causes those balances to increase or decrease.
Once you have set the loan balances that are to be affected by the transaction, click Next > to go on to the next page of the Wizard.
On this page, you will specify the Statistics that are to be affected by this transaction. You may affect up to four statistics with the transaction. Select the statistic to be affected from the drop down list, and then specify if that statistic should be increased or decreased.
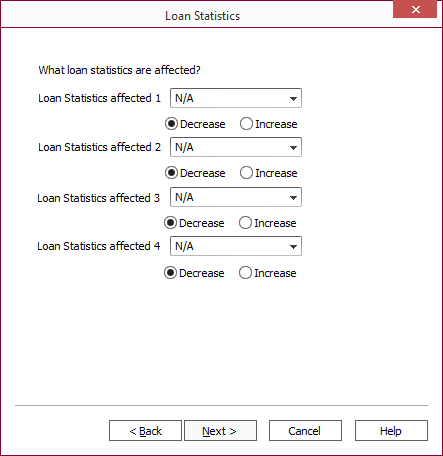
Click Next > to go on to the next page of the Wizard.
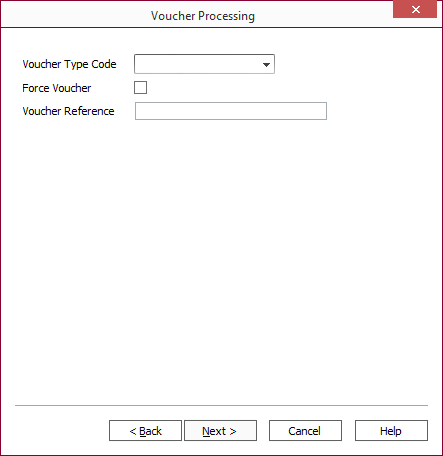
Click Next > to go on to the next page of the Wizard.
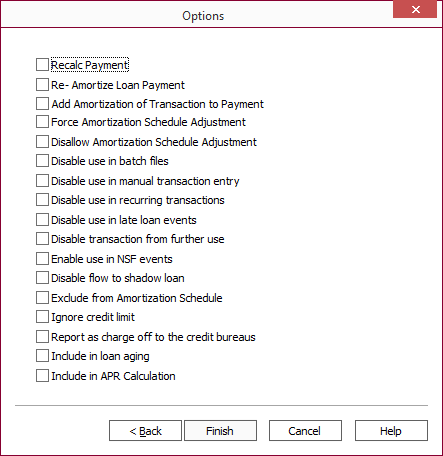
Enter the transaction code options.
Click Finish to save the new Transaction Code.
If the transaction entered was a receivable, and if the payment transaction that you linked to was defined with a transaction code for a transaction that does not yet exist, an alert will indicate that a payment record needs to be entered.
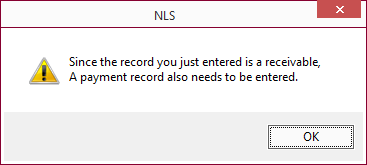
Click OK to go back to the beginning of the Wizard so that you may configure a payment transaction with that transaction code number.

